How to make a light on the balcony or loggia yourself
Wire light to the balcony or loggia is not difficult, the work can be done independently and save money. But it is necessary to understand the subject well, to choose the fixtures and connect them in accordance with safety standards. Any violations can lead to problems and will have to redo the system or even lay the wiring again.
Features of lighting of the balcony and loggia
Before you start the work, you need to understand a number of points that affect the choice of equipment, the way of laying the wiring and connection. The following are taken into account:
- Glazed balcony or not. If the space is open, it is necessary to buy a street light and use a cable of a suitable type. In this case, the light is most often used occasionally, so the main attention is paid to functionality, the appearance does not matter much.
- For glazed, but not insulated balconies and loggias should also use equipment designed for the street. In winter, temperatures will drop below freezing, and the luminaire is also affected by humidity fluctuations and other adverse factors.
- On insulated structures, you can use luminaires for rooms with increased protection against moisture. The figure is selected by the IP value, it consists of two digits, the main value has the second. It should be at least 4, so that when humidity fluctuations water does not penetrate and cause oxidation of contacts and corrosion of metal.
- If the design is insulated and heated or combined with living space, then the lighting on the balcony or loggia can be done in the same way as in the rooms. It is allowed to put any light fixtures, there are no restrictions on resistance to moisture and dust.
If the balcony or loggia will subsequently be insulated or equipped with heating, then the wiring does not need to change.
Electrical safety requirements for the balcony
In order to eliminate any problems when connecting the light and its further use, it is necessary to follow a few recommendations that ensure safety. Work with electricity requires care, and the system must eliminate any risk of electrocution or short-circuiting. Remember the following:
- Disconnect the power supply at the appliance panel before beginning work. If the system will be powered from a nearby outlet, only the circuit breaker responsible for that direction can be snapped, if it is separate. When connecting through the switchboard is worth putting a separate circuit breaker on the balcony, this is the most convenient and reliable solution.
- Use a tool with a dielectric coating of handles. Even when the power is off, it is worth using such devices to eliminate even the slightest chance of problems.
- If you will be making a hole from the socket to the balcony, check the surface with the device, there is no hidden wiring in the wall, so as not to damage it.
- It is better to choose fixtures with a higher level of protection against moisture, because even on insulated structures, the impact of temperature and humidity fluctuations is much greater than in the room.
- To lay the cable to use a special non-flammable corrugation, to provide additional safety. Therefore, the size of the hole must be made with this aspect in mind.
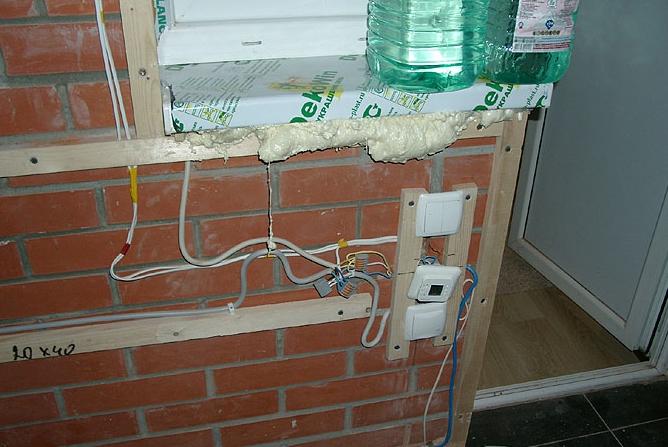
- Connect the wires with special pads, preferably of the closed type, which protect the contact from moisture. If you use stranding, you should additionally solder the joint to ensure good contact and protect the bare wires from oxidation.

The light on the loggia or balcony should provide good visibility. Its brightness is chosen depending on how the area will be used.
Types of lighting on enclosed balconies
The quality of light depends on the fixtures and bulbs used. There are several options, but it is not difficult to understand them. It is worth doing this before buying.
Types of bulbs
The quality of light, durability and power consumption depends on this. There are also other important points to be sure to consider when choosing:
- Incandescent bulbs.. Cost the least, but also inferior in quality to all analogues, the light is yellow, during operation the bulb is strongly heated. Use this type for built-in lamps is not worth it. The service life is the shortest.
- Halogen lamps. An improved type with a tungsten filament and halogens pumped into the bulb. Due to this brightness is much higher, but electricity consumption is almost the same as that of incandescent lamps. The service life is not very long.
- Fluorescent light bulbs. They give an even light of different temperatures. Consume several times less electricity, last much longer. Suitable for standard sockets, the only disadvantage - poorly tolerate temperature changes, in unheated balconies is better not to use.
- LED bulbs LED lamps are the most economical today, with a lifespan of up to 50,000 hours. Give an even light without flicker, you can pick up different shades or adjust the brightness with a dimmer.
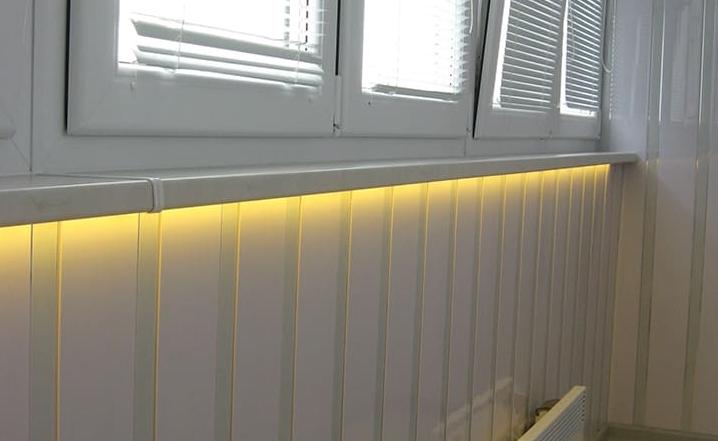
Lighting on the balcony can be made with LED strip. This is a simple solution that consumes little power and allows you to highlight individual elements, giving a soft diffused light.
Types of lights
To decorate the balcony correctly and provide comfortable lighting, it is necessary to choose a suitable light fixture. It affects not only the light, but also the design of the room, so you need to consider a few recommendations when choosing:
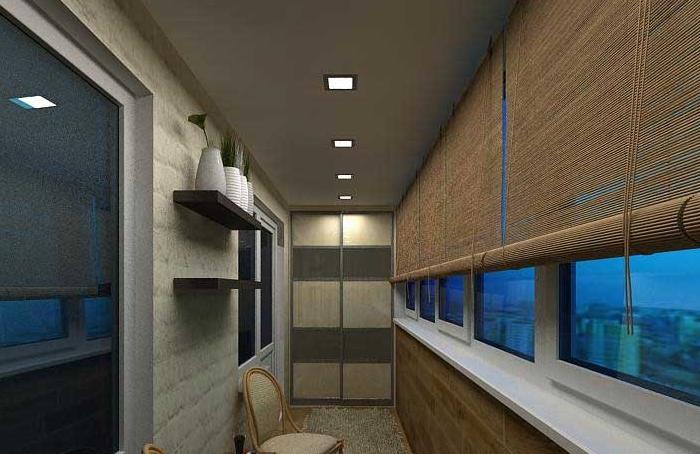
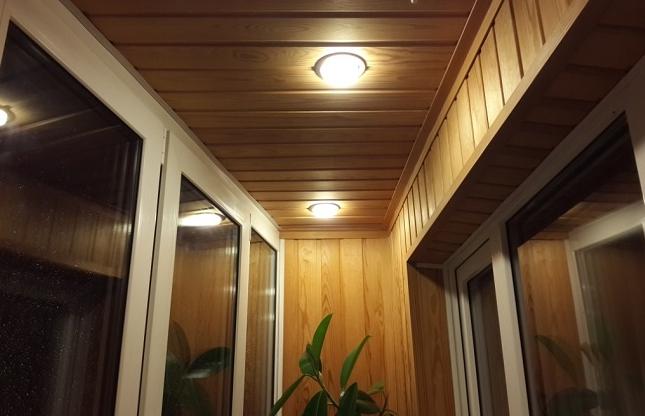
- Spotlights. are hidden under the surface of the ceiling, so they are suitable for wood panelling, plastic panels, drywall and stretch ceilings. There should be a void of at least 7 cm, so that the body fits and does not overheat when in operation. They look modern and concentrate light in a small area, you can put them every meter or more often, it all depends on the required level of lighting.
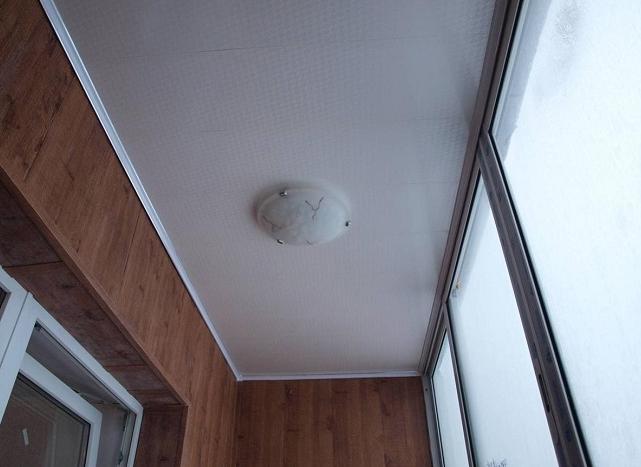
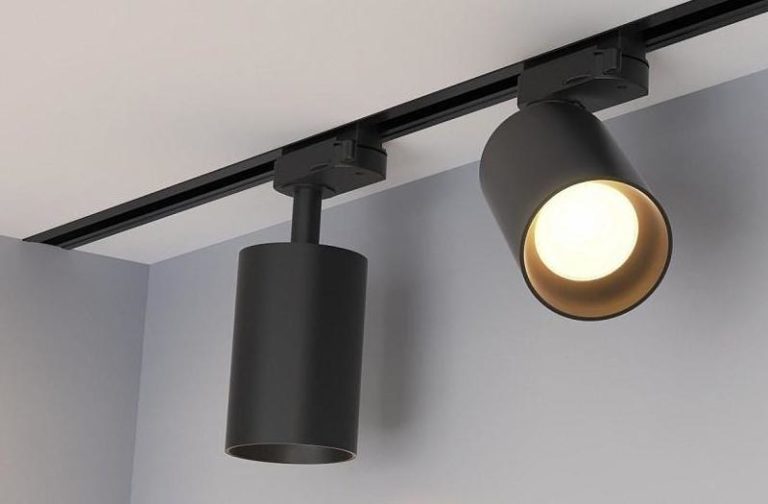
- Overhead options are used for ceilings without a void. These are spot lights in a beautiful housing, which are attached to the surface. Another interesting type - track systems, when along the balcony is mounted bar, on which the plafonds are placed in the right places.
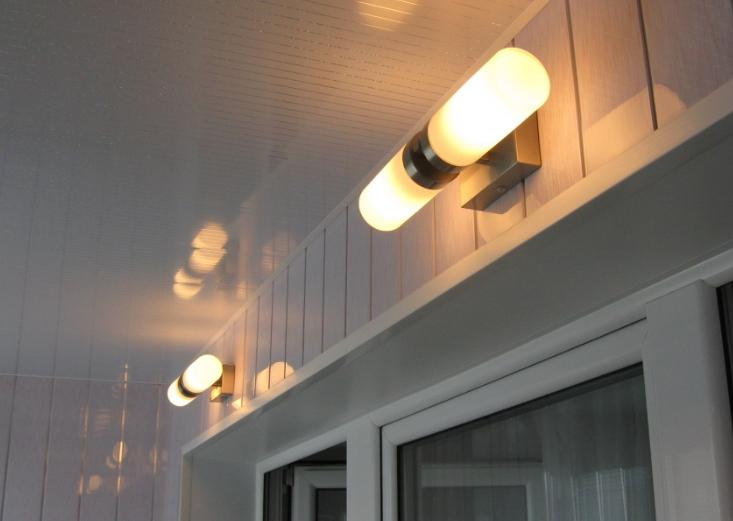
- Wall models provide diffused light and can highlight a small space (such as a table). The first type is sconces with lampshades, they are best suited to classic settings. Light fixtures with diffused plafonds are well suited to modern interiors, there are a lot of models.
- Ceiling-mounted designs are suitable for general lighting. It is better to use compact chandeliers, in which the horns diverge parallel to the ceiling surface, so as not to take up space. Another option - large-sized plafonds or light panels that give an even diffused light and can qualitatively illuminate the space.
- LED strips are used to highlight individual structures, or to create a soft background if placed around the ceiling or in a specially prepared niche. Mount can be anywhere on the ceiling or on the wall due to the adhesive layer on the back.
You can combine different solutions to achieve the desired effect and highlight certain areas.
How to connect the light yourself
The work is not complicated, but it requires accuracy and strict compliance with all recommendations. For simplicity, the process is divided into small steps, which should be performed in order.
Choosing a wiring location and drawing up a project
Power for lighting and outlets (if any) on the balcony can be fed from different places. It is necessary to proceed from the situation and choose what is most suitable:
- Connection from the distribution board of the apartment. The best solution, as you can put a separate circuit breaker and power the system separately. But the laying of wires will have to do from afar. Therefore, it is best to immediately lay the cable during the repair, when all the wiring is done. If the finish is already finished, it is better to choose another way.
- Connecting to a junction boxIf it is located in a room adjacent to a balcony or loggia. Another good solution that will provide reliable power. Usually you need to do a lot less drafts. But if the box is located far away and you do not want to spoil the wall, it is better to choose the following method.
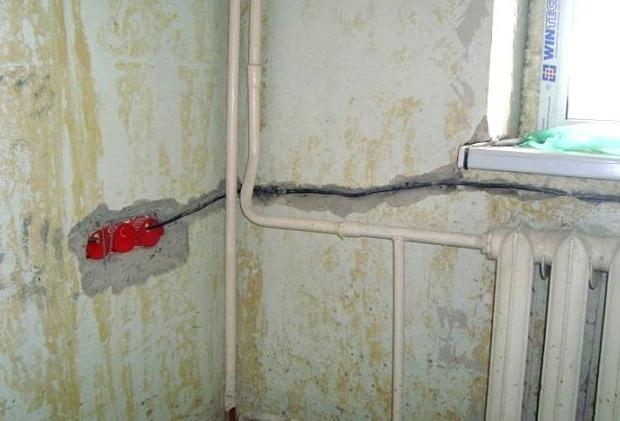
- Bringing the wires from the nearest outlet. Most often it is located closest, so it is more convenient to lay the cable than from the junction box. From the socket is done stroba on the balcony, inside the strand is soldered for reliability.
Once the place of connection is defined, you can make a simple project. It will allow a good idea of the result and to make the necessary calculations. It is necessary to take into account several points:
- Determine the types of fixtures used and their location. You also need to think about the position of the switch and outlets, if any.
- Make a simple diagram showing the connection point and places of installation of the main elements of the system. The main thing is to observe the basic proportions and to provide for everything that will be required.
- Calculate the amount of materials. These are light fixtures, junction boxes, switches and sockets, cable, fasteners.

When buying materials and components, give preference to quality products, do not save on the reliability of light fixtures and switches.
Choosing the cable and its laying
Before selecting a particular option, it is necessary to make simple calculations. To do this, add up the power of the lamps and outlets used. It is necessary to know the figure before buying the wire:
- In the store to orient the salesman on the powerIt is worth adding a margin of 30% to avoid overloading. You can also choose your own amperage using the data in the table below.
- It is recommended to use products with copper conductorsAs they have less resistance, have better current carrying capacity, and are easy to bend. Aluminum is inferior in performance, but can also be used on a tight budget.
- Always make a 10-15% margin when buyingAs the actual flow rate may differ from the planned. It is also necessary to leave the ends for connection to the box, switch, lamp, etc.
Below is a table for selecting the cross section copper cable For concealed installations
| Cross section, mm² | Wire diameter of the cable, mm | Current, A | Power, kW at voltage 220 V | Power, kW at 380 V |
| 1 | 1,12 | 14 | 3,0 | 5,3 |
| 1,5 | 1,38 | 15 | 3,3 | 5,7 |
| 2 | 1,59 | 19 | 4,1 | 7,2 |
| 2,5 | 1,78 | 21 | 4,6 | 7,9 |
| 4 | 2,26 | 27 | 5,9 | 10 |
| 6 | 2,76 | 34 | 7,7 | 12 |
| 10 | 3,57 | 50 | 11 | 19 |
| 16 | 4,51 | 80 | 17 | 30 |
| 25 | 5,56 | 100 | 22 | 38 |
| 35 | 6,68 | 135 | 29 | 51 |
The table below helps you to choose the cable cross-section depending on the capacity of your electrical equipment.
Do not forget about cable fasteners and corrugated sleeve or cable duct, it all depends on the method of installation.
After you buy the cable, you need to choose a method of laying it. There are two basic methods, each with its own pros and cons:
- Open laying involves the use of cable channels The open laying involves the use of cable ducts of the appropriate size. They are attached to the wall with small dowels, then the wiring is laid and the outer cover is closed. Everything is simple and fast, but the appearance is not the best. It can be used if the repair is made recently and you do not want to spoil the walls.
- Concealed laying is much more complicated. You will need an angle grinder with a disc on the concrete to cut chinks, then a perforator with a spatula must knock out a recess, lay the cable in a corrugated sleeve and fasten. Then caulk the unevenness with mortar and level the surface, so that the place of laying was not visible. Then you can putty and glue wallpaper.
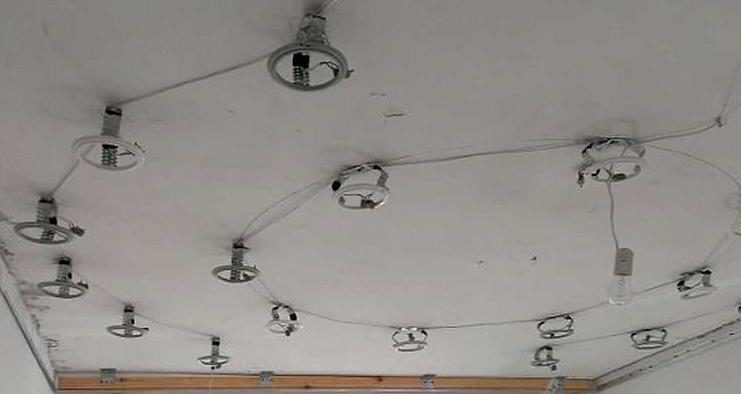
On the balcony you can conduct concealed wiring, placing it on the ceiling frame, in this case you can not fix the cable. In this case, the use of corrugated sleeve is mandatory.
Suggested viewing: Professional wiring and connection of lighting fixtures on the balcony
Installing light fixtures
The choice of installation method depends on the type of luminaire and the surface on which it is mounted. Several recommendations should be taken into account:
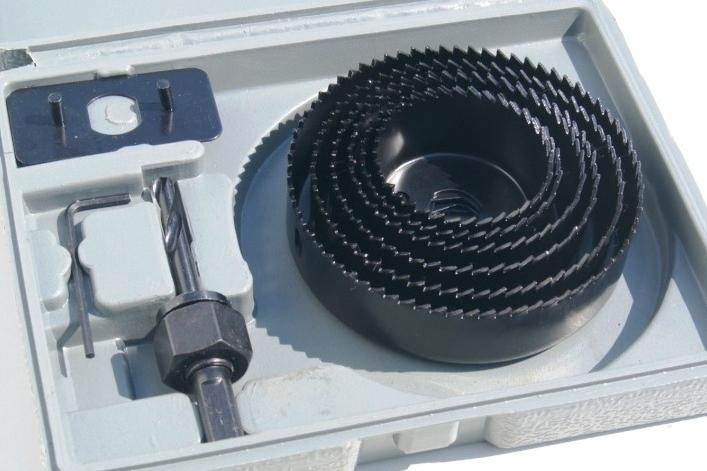
- Before installing recessed luminaires, you need to cut holes according to the diameter of the body, it is indicated on the package. To do this, use a crown or an electric jigsaw. If a tensioned canvas is installed, then a special ring is glued in advance, so that the material does not tear when the hole is cut.
- For wall options, either dowel nails (for concrete and brick), or self-tapping screws (if the surface is clad with wooden battens) are used. Before drilling a hole, find a drill of suitable diameter and mark the mounting points by placing the bracket on the wall.
- Ceiling chandeliers and light fixtures must be attached in the same way as when mounting on the wall. If a suspension system is used, then you need to fix the mounting platform over it or purchase a special dowel for hollow structures, which can withstand the weight up to 5 kg without additional reinforcement.
To connect the wiring, it is better to use special pads, they can be both standard and snap to simplify installation. Connections are additionally protected if the balcony is not heated.
Make a light on the balcony with your own hands is not difficult, if you understand the subject, think through the idea to the smallest detail and make a detailed scheme. When laying the cable to use one of the options described, mount the light so as to prevent it from falling in all conditions.