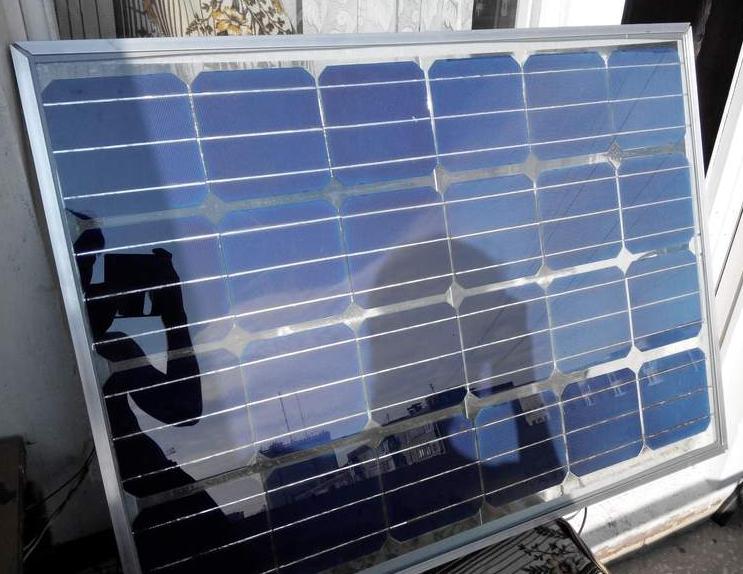
How to make a solar panel at home
Solar panel with their own hands is much easier to assemble than many people think. To do the work, you do not need to be a specialist in electrical engineering, the tools used are those that can be bought for little money. The main thing is to understand the subject well, make a detailed diagram and buy quality components.
What photocells are suitable and where you can buy them
First of all we need to consider what kinds of photocells produce at the moment and understand their features:
- Monocrystalline silicon panels are made from the highest quality ingots. They are cut into thin wafers, which have a long life - up to 50 years and an efficiency of about 19%. But the price of this solution is also the highest.
- Polycrystalline modules are made of lower quality silicon, but have a good efficiency of 15%, which with a lifetime of 25 years makes it the best option in terms of value for money.
![Polycrystalline variants]() Polycrystalline variants are the best fit.
Polycrystalline variants are the best fit. - What makes amorphous modules different is that the silicon is sputtered onto a flexible backing. This makes the sheets light and inexpensive, but they are worse than the first solutions in terms of durability and performance.
Homemade versions are always inferior to factory solar panels in terms of efficiency. This is due to a number of reasons, from the accuracy of calculations and the quality of parts to the inability to buy some components separately. But if you choose the right type and do the work according to the instructions, you can get a high-quality and effective module.
There are no film versions on sale, so you have to choose between monocrystalline and polycrystalline products. The second type costs less, so it is used more often.

Preparation of the project and the choice of location
It is not difficult to make the simplest scheme of a homemade battery, for this you need to take into account a few points:
- The necessary power. Calculated based on energy consumption. You can cover only part of the needs, increasing over time, and you can immediately install as many panels as you need for full autonomy.
- Number of photovoltaic cells and their accessories. It is better to calculate in advance to order everything you need and not to wait weeks for delivery of the missing part.
- It is worth thinking in advance about the design of frames and mounting system, they must ensure reliability. It is important that the solar panels will not topple or fall over if there is a strong wind, as they will be ruined.
The location is chosen so that the solar panels most of the day fell light. The most common place to put the panels is on the on a roof or on the ground. It is important that no shade falls on the surface. The angle is selected depending on the region, in the middle belt the optimal value is between 50 and 60 degrees. In winter you can increase the angle to 70, and in summer to reduce to 30-40 degrees.
Assembling the structure
Solar panel with their own hands is collected in several stages. It is best to do the work in order, so as not to miss anything and achieve a good result.
Making the frame

The base for the future photocells must be strong and durable, it can be made of different materials. You can use moisture-resistant plywood or OSB boards, the work in this case is carried out as follows:
- Cut pieces of suitable size, around the perimeter is made framing of a wooden bar, it is important to precisely fit all parts to each other, so that there are no gaps, and the joints and connections to smear with a weatherproof sealant. The surface is then coated with a protective composition or paint and left to dry completely. It is better to apply the coating in several layers.
- Use an aluminum frame, as it is much stronger and more durable than a wooden one. In this case, corners are picked up and connected to make a strong frame. In it put plexiglass or other transparent material, all joints must be treated with sealant to avoid gaps. Continue the work after the composition is completely dry, the excess can be cut off with a construction knife.
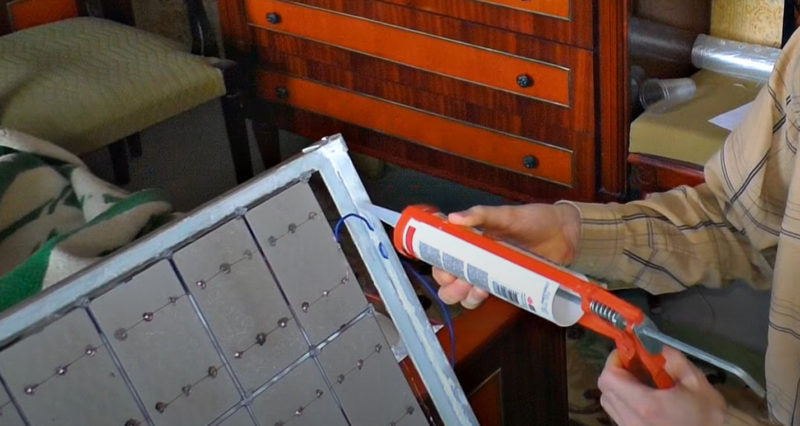
![How to make a solar panel at home]() Sealing the product is mandatory.
Sealing the product is mandatory.
By the way! The dimensions of the frame are chosen according to the parameters of the purchased photocells. Until they are available, it is better not to make a frame.
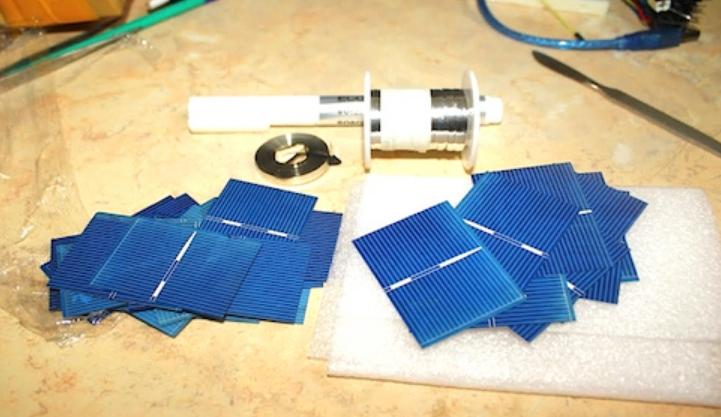
Soldering of wires and connection of photocells
All modules have contacts that have different polarity, before starting work, they are wiped with alcohol, and then the conductors are soldered to them. Only then can they be connected together to assemble the system. If the conductors are already soldered, be sure to check all connections, often there is a defect that must be corrected before installation. If special busbars are used, the instructions for the work are as follows:
- The tires must be cut into strips of suitable size if they come in one sheet. The contacts on the plates must be wiped with alcohol to degrease them, after which a small layer of flux is carefully applied.
- The tire should be attached to the contact along its entire length, and then the heated soldering iron should be drawn across the surface without pressure, so as not to spoil the panel. After cooling, the element is turned over and the work is repeated on the contact on the second side in the same order.
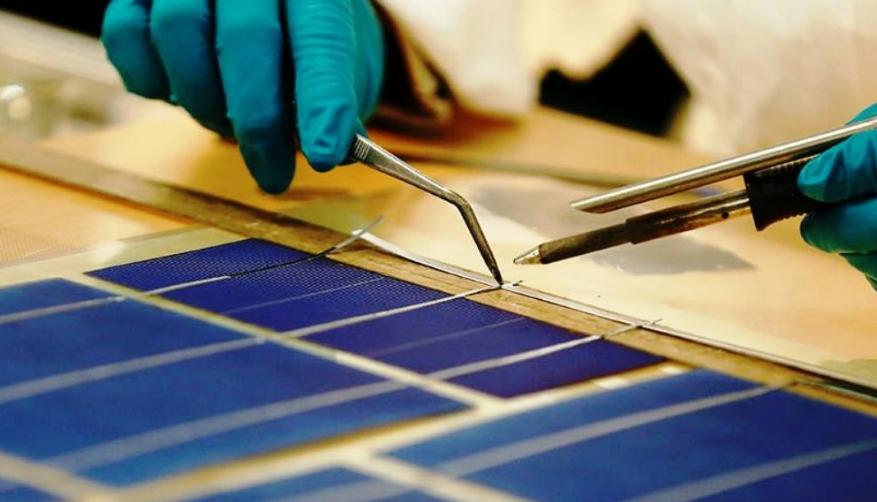
![How to make a solar panel at home]() Soldering must be very carefully.
Soldering must be very carefully. - To correctly place the connections and choose the right length, first lay out the modules on the prepared base and mark their position.
- Prepare the solar cell with your own hands is not so difficult. After the contacts are attached, the modules are put in place and connected to each other. The main thing is to make sure that the polarity is observed.
If there are irregularities in the connection of the busbar with the contact, it is necessary to run a soldering iron over the surface again.
Applying Sealant
At home, it is easiest to use construction weatherproof compositions, which are sold in all stores. The work is carried out as follows:
- First you need to apply drops of the composition on the edges of the photocells at a small distance. After that, they are placed on the transparent base according to the markings made earlier. It is important to align the modules evenly and press them as tightly as possible to the surface.
- To fix in a suitable position, any weights are placed on the places where the sealant is applied. They can be removed after the sealant has dried.
- Next, it is necessary to cover all edges, as well as the joints between the elements with sealant to completely seal them. When doing this, it is important not to get on the working parts.
Assembling the panel
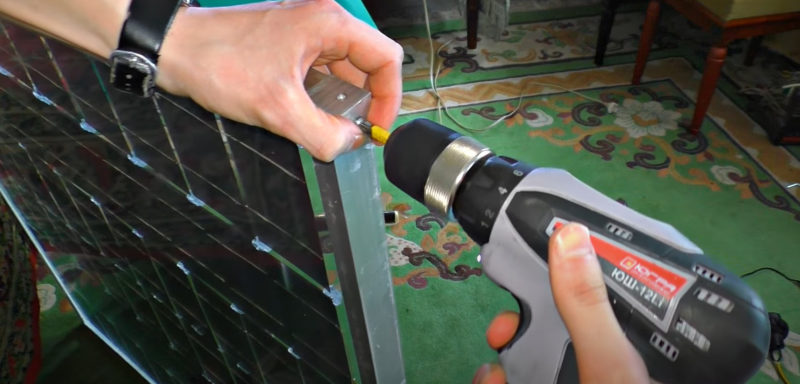
When the sealant has dried, you can carry out the final assembly. There may be its own peculiarities depending on the system, but most often the process looks like this:
- First of all, in the side of the enclosure, a connector is attached, to which the Schottky diodes must be connected.
- A screen of transparent material is cut on the outside, which is best secured with sealant to ensure that the construction is airtight and that moisture does not get inside.
- The finished element is checked for proper operation. If everything is normal, you can put on a frame of mounts to install the battery in the prepared place.
How to make a power source from improvised materials
To assemble the simplest battery can be made from improvised elements. There are several options, the most popular are the following:
- A piece of copper foil is taken and heated on an electric stove for half an hour, after cooling, the oxide film is removed from the surface. A second piece of the same size is cut, both elements are slightly bent and placed in a cut bottle or jar, so that they do not touch each other. Crocodiles are attached to the edges, salt water is poured into the container, after which the current will begin to be generated.
- If you have a lot of unnecessary transistors on hand, you can remove the semiconductors from them and assemble a solar panel. The assembled elements are put on a plate and connected, then a wire is connected and you can use the system. This option will not give a lot of energy, but it will be enough to work the radio and charge the phone.
- It is possible to make a power source from diodes, for this purpose it is necessary to open them to open the photocell. To remove it, the cell is heated to melt the solder. The extracted crystals are soldered to the body and connected to the system.
- Beer cans can be used to assemble a structure for heating water or air. To do this, the top is cut out in them, a hole is made in the bottom, the container is well washed. Then a large box is made from a wooden bar and polycarbonate. The cans are placed in rows and connected with sealant. After painting the surface black, you can put the module outside.
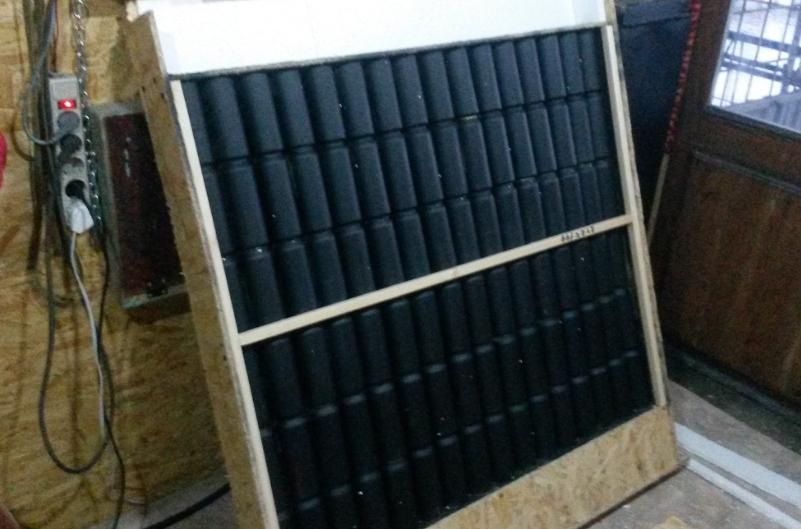
It is easiest to press the cans with long plates or bars, placed every 50-80 cm.
Installing and connecting the solar panel
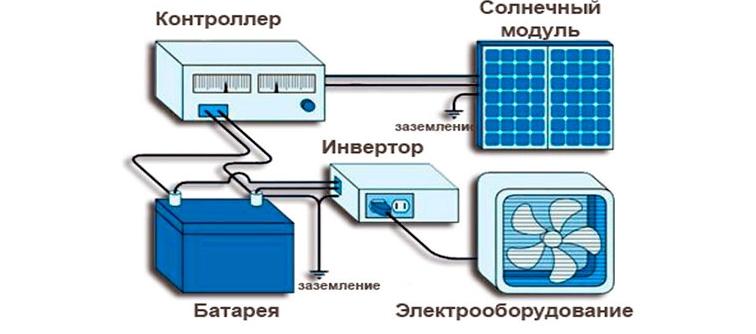
Once the battery is installed, it must be wired properly to ensure that it is energy efficient and stores electricity when not in use. It's simple:
- A controller is connected to the module, it is desirable to place it as close as possible.
- Batteries are placed in a designated area. It is best to use gel batteries.
- To convert the voltage it is mandatory to have an inverter.
Here everything is similar to the systems with ready-made batteries, so it is not necessary to understand the subject.

What affects the efficiency of solar panels
In order to maximize the effect, it is necessary to follow simple tips:
- Put the batteries in a place with the best light during the day.
- Periodically wash the protective glass of dirt and dust.
- Adjust the tilt angle according to the season.
- Use an inverter that is suitable for the capacity.
- Check the condition of contacts and connections.
If lenses are used, the efficiency of batteries is greatly reduced in cloudy weather.
What's better - buy or build a solar panel
There is no unambiguous answer, it all depends on the budget, the necessary parameters of the system and the cost of each option. It is best to make a comparative analysis of both types, to compare the material and time costs for each type.
Usually, making it with your own hands is two times cheaper, so if you need to save money, it is better to choose the homemade type. If there are no budget constraints, it is better to use ready-made systems.
Detailed assembly video instruction from the popular channel KREOSAN
To assemble a solar panel with your own hands is not difficult, if you understand the features of design, calculate the required number of modules and buy them in advance. It is important to follow the instructions for assembly and ensure the tightness of homemade modules.