How to make a light bulb garland with your own hands
Garland of bulbs with their own hands is made quite simple, if you understand the subject and buy everything you need to work. It is important to use only quality components and work according to instructions, observing all safety requirements.
What you need to know about the garland
Since there are a lot of low-quality garland on sale, it is possible to assemble a reliable and durable device yourself. But first of all it is necessary to understand the features of this type of products:
- The type of bulbs used. If previously incandescent bulbs were used, which is not very economical and reliable, now almost all models are equipped with LED lampswhich last dozens of times longer, are not heated when working and much safer to use.
![LED Equipment]() LED equipment operates from low voltage.
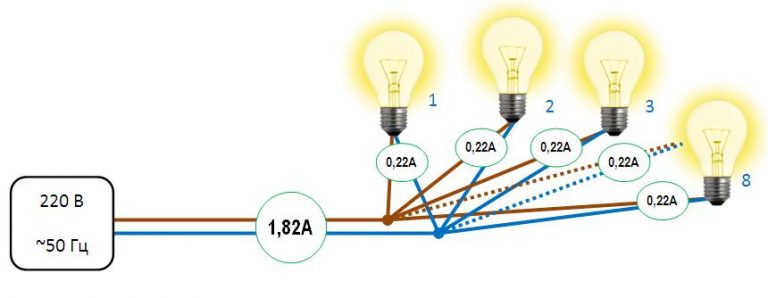
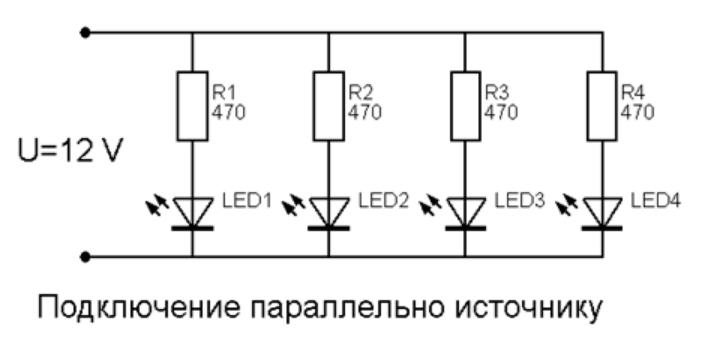
LED equipment operates from low voltage. - Type of connection. The simplest and cheapest options have a serial connection when the wire goes from one base to another, which is not very good. The voltage gradually decreases, and if one of the bulbs in the chain burns out, the entire device stops working. When parallel connection the voltage comes to each bulb separately, which ensures an even glow. And if one of the light sources fails, the others will work.
![How to make a Christmas garland of bulbs with their own hands]() Diagram of the parallel connection
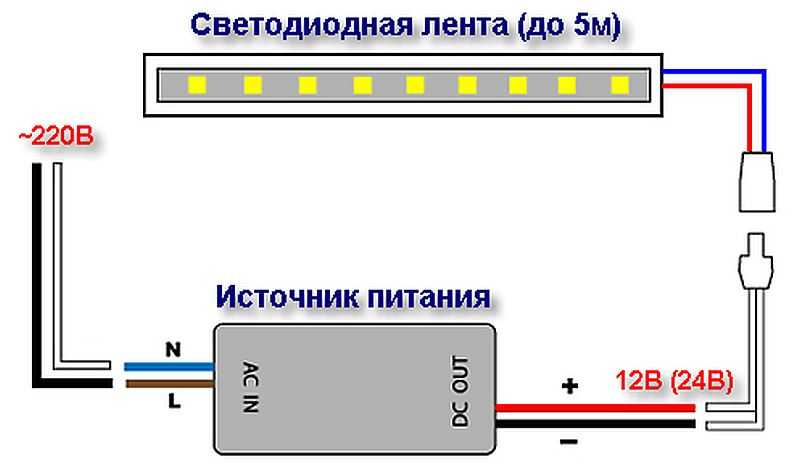
Diagram of the parallel connection - Mains voltage. There are solutions that work from the standard 220V, but it's much easier and safer to use a power supply to make the garland turn on from 12V.
By the way! Also, the way of connection can differ, it can be a cartridge, a plug or soldering contacts.
Advantages and disadvantages
Homemade electric garland has its own advantages and disadvantages, from the pluses we can highlight such:
- It is possible to make a product of desired length, which allows you to get a version of the right size for the room or street.
![How to make a Christmas light with your own hands]() It is possible to make a garland of any size.
It is possible to make a garland of any size. - Using light bulbs of the right color and wattage .which allows you to achieve the best effect.
- Saving money, because it is cheaper to assemble the lights than to buy an analogue of the same quality.
There are also disadvantages to this solution:
- If you assemble the system incorrectly, it will not work or will fail quickly.
- You need at least minimal skills in assembling electrical devices to do the job. And in some cases, you will have to do a lot of soldering.
What garlands can be.
There are many options that can be implemented by yourself, the most popular of them are as follows:
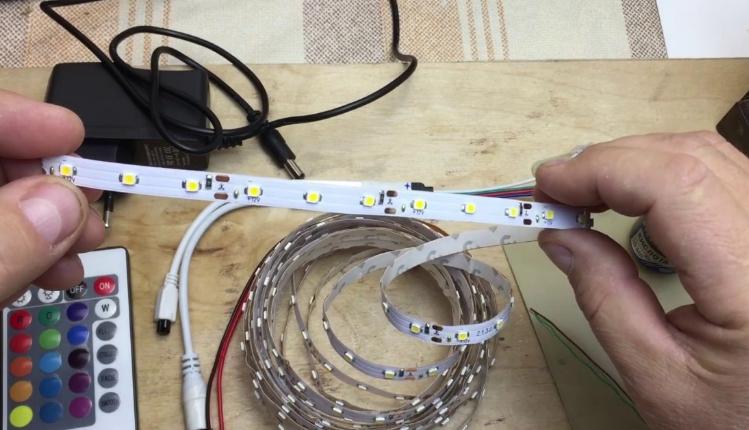
- Using Monochrome LED strip To create a flashing strip. To do this, a controller is soldered to it, which will be able to control the system and provides different modes of flashing. You will also need a power supply of suitable capacity.
![How to make a light bulb garland with your own hands]() LED strip can be used to make a garland with running lights.
LED strip can be used to make a garland with running lights. - Multicolor RGB-tape is much more beautiful due to the fact that the lights on it can not only flash, but also shimmer in thousands of colors. The main thing is to choose a quality controller.
- You can assemble a garland of individual LEDs, the main thing is that their voltage is not exceeded.
- It is not difficult to assemble a system of wires and sockets, in which the bulbs of the appropriate type are screwed in.
You can use both new parts and used, if such are on hand.
Choosing the right materials
To make a LED garland, it is important to preassemble everything you need. Accessories are sold in radio electronics stores and cost little. You will need the following:
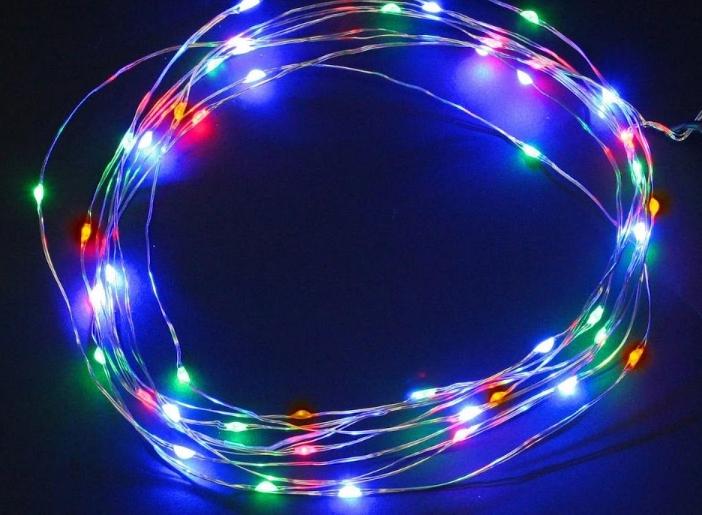
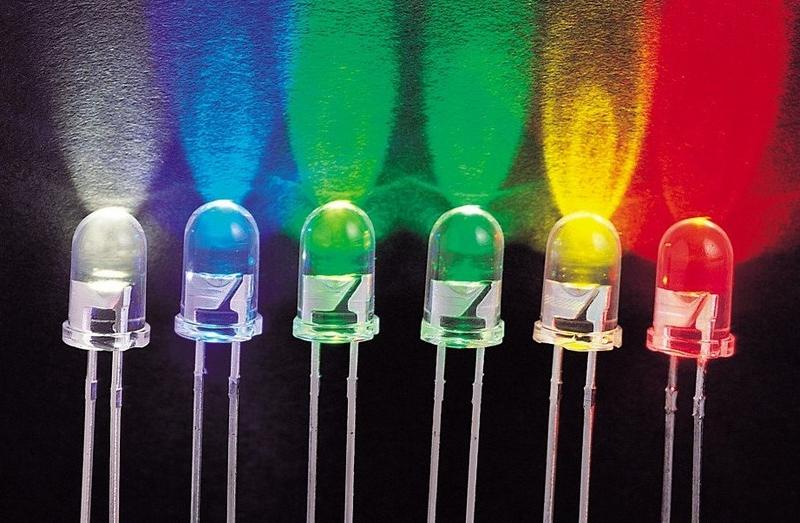
- LEDs Of different colors with a diameter of 4 to 5 mm, the allowable current is about 20-30 mA. The voltage drop value should be between 2.1 and 3 V. As for the number, you need to determine the length of the garland and the spacing of the lights, most often they are placed 25-30 cm.
![How to make a light bulb garland with your own hands]() Multicolored LEDs are inexpensive.
Multicolored LEDs are inexpensive. - It is also necessary to choose resistors. If the system will use a series connection, you will need only one element. If parallel, you need to use either one resistor per diode, or divide the system into small groups. It is important to choose a variant with suitable performance, usually the store offers the best solution if you explain how the system will be assembled.
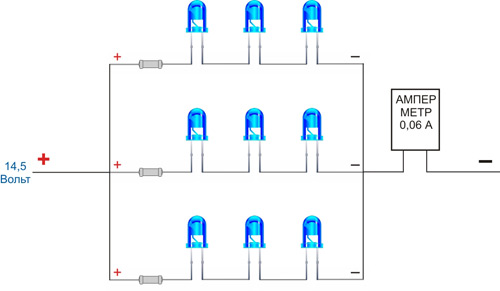
![The scheme of a series-parallel connection of three consecutive groups of LEDs in]() Scheme of series-parallel connection of three consecutive groups of LEDs in a chain of three LED elements. Each chain has a current limiting resistor on the left side. It "dampens" the excess of the sum of the direct voltages of the diodes.
Scheme of series-parallel connection of three consecutive groups of LEDs in a chain of three LED elements. Each chain has a current limiting resistor on the left side. It "dampens" the excess of the sum of the direct voltages of the diodes. - The power supply is also to be purchased for a specific product. It is necessary to calculate the total power of all used LEDs and increase it by 20-30%. The resulting figure will be a guideline for selecting a power supply.
![How to make a Christmas garland of bulbs with their own hands]() Connecting the LED strip to the power supply.
Connecting the LED strip to the power supply. - Also be sure to buy a safe plug, it is convenient to use a collapsible version, it is easy to connect.
By the way! It is best to use a stranded copper cable, as it bends well and serves much longer.
Wiring diagram
It is worthwhile to draw at least the simplest diagram in advance, which can be used as a guide during assembly. It will help in calculating the amount of materials, determining the length of the wire, you can also roughly determine the size, so you can not count in your mind, and clearly see what the result will be.
There are a lot of ready-made options on the web, it is not difficult to find the right one to make your work even easier. You can use the scheme as it is, or you can use it to make your own if you need to make changes or the characteristics of the equipment are different.
Small garlands can also run on battery power.
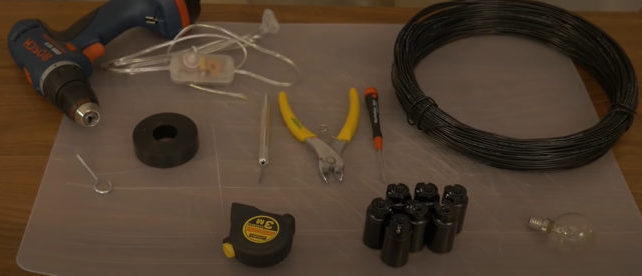
Step by step instructions for assembling the version with bulbs
Garland of bulbs is assembled differently than LED, you should understand the process to do everything correctly. Since the system runs from 220 volts, reliability and safety are important here: follow the steps in the table.
| Step 1. To give the product a vintage look, you need to prepare the twisted wire. To do this, it is necessary to separate the cores. One end is tied to the wall, and the other end is fixed to the chuck of the drill and coiled, so that you get enough tight coils. You do not have to be too hard, it is important not to damage the insulation. After twisting, it is worth to knead the wire and let it lie for at least a day, so it takes a new shape. | 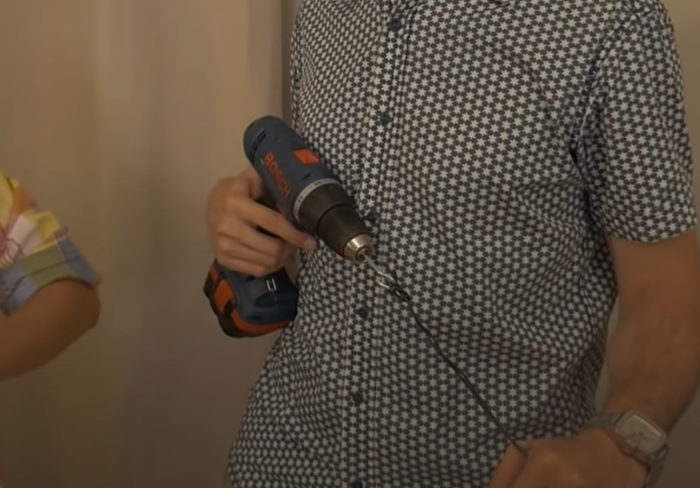 In the chuck of a screwdriver you can insert a hook from an anchor, or bend a loop of tight wire. |
| Step 2. After twisting, you need to mark the wire. To begin with, leave a 1.5 m long end for the power plug, on the second side you can put a light bulb or add an additional plug. Mark the location of the sockets, usually they are placed every 50-60 cm. At each mark, the wires are pulled apart to make a ring with a diameter of 2 cm. On each of the cores bare insulation in a section of 15 mm and with the help of a nail form loops. | 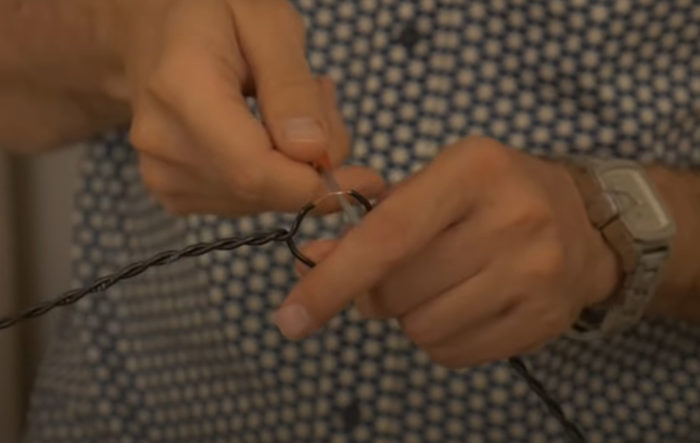 You can make the rings with a screwdriver. |
| Step 3. Take an old-style plug, disassemble it, then you need to arrange the bare ends of the wire length of 10-15 mm and clamp with screws. The cable itself in the place of fixation in the case should be in insulation, so it will be less deformed. | 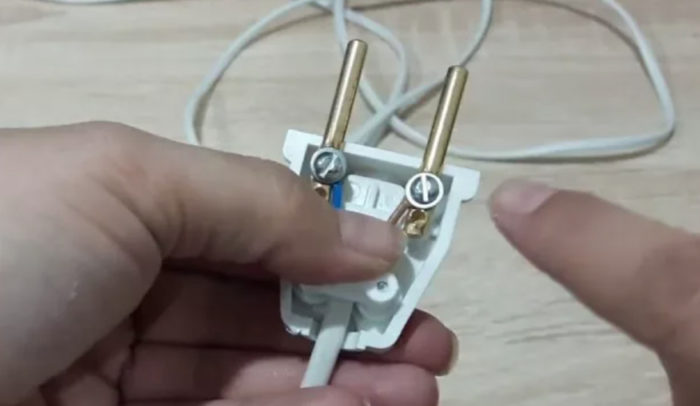 The current in the 220 V mains is alternating, so you don't have to observe the polarity. |
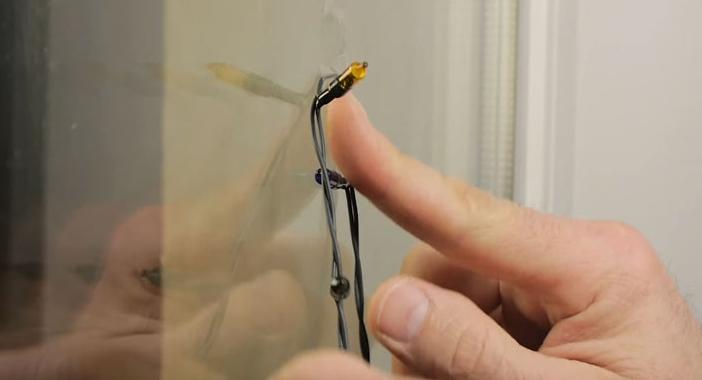
| Step 4. The socket is disassembled and fastened to the bare loops on the wire with bolts. Then you have to reassemble it. After all the sockets are installed, the bulbs are screwed in. | 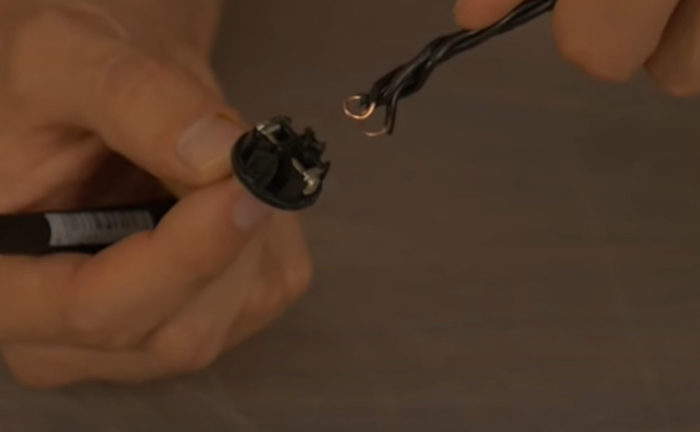 The polarity does not matter here either. |
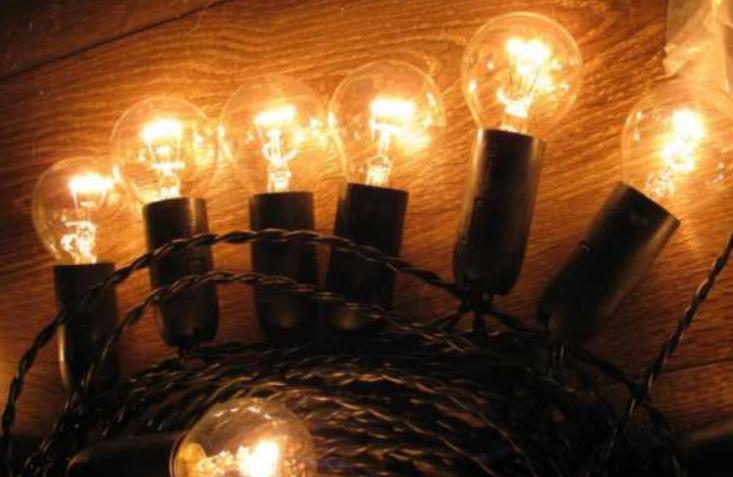
| Step 5. Check the operation of the system, if everything is OK - the garland can be hung. | 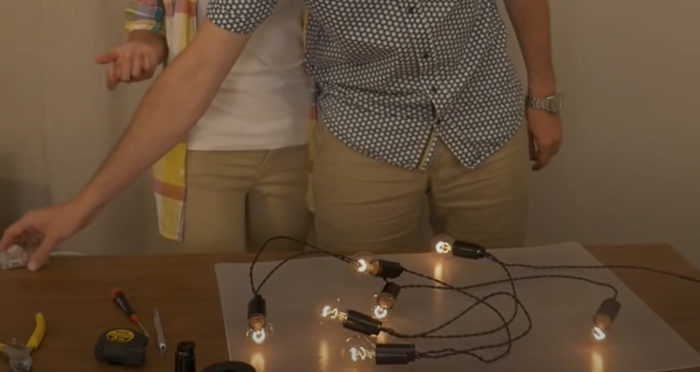 The garland is ready, you can start to install it. |
To reinforce the information video: The process of creating a simple retro light bulb garland.
What else you need to know
There are a few important points to consider as well:
- To make a garland with running lights, you need to purchase a three-phase multivibrator. It only works with LED equipment.
- To use only diode products for outdoor use, it is best to additionally protect the connections with heat shrink tubing, and the socket and control box should be placed indoors. Outdoor lights should be much stronger than home lights.
- If there is an old garland that doesn't work, it can be repaired. To do this, first remove the power supply, measure the diameter of the used diodes to find out their characteristics through the Internet. The power of the resistor is calculated, it is soldered in place of the block, and then you can turn on the lights.
Restored according to the described method, the lights will just burn, they can not flash without the control unit.
Safety rules
To exclude any problems, you should follow a few simple tips:
- Conduct soldering in good light, using quality solder and flux.
- Protect all connections with heat shrink tubing and do not leave bare wire connections.
- Give preference to low voltage garlands.
- Be sure to check the operation before installation.
Assemble a homemade garland is not difficult if you use the right accessories and follow the instructions. It is important to follow all the rules to eliminate the risk of electric shock and get a system that will work for a long time.