How to assemble LED strip by yourself
LED lighting is rapidly displacing other sources of light, even in those niches where the position of traditional devices seemed immutable. Moreover, the emergence of LED-equipment in the lighting market has made it possible to create new lighting fixtures, of which not so long ago there was not even an idea. Thus, LED strip is rapidly gaining popularity. It can be used to create a bright, durable, but energy efficient household or decorative lighting. Installation and connection of LED strips can be performed independently.
Ways of installing LED strips
This class includes lights with a supply voltage of 12,24 or 36 V. Such devices are recommended for use in residential or service rooms (on the street you can use devices and for 220 V). The choice of mounting method of a luminaire is made on the basis of its linear or specific power. This is called the power consumption of 1 meter of cloth.
Low-power LED-lights
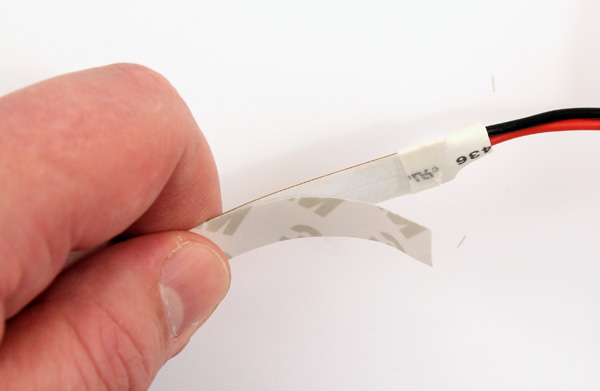
Devices with a linear consumption of up to 10 watts can be referred to this category. They can be mounted directly on the substrate. For fixing, the manufacturers have provided a standard adhesive layer. You just need to remove the protective cover and glue the substrate in the right place. Natural air movement is enough to cool the fixture.
The success of the event depends largely on the preparation of the surface:
- the place where the cloth is glued should be flat;
- It must be cleaned from dust and dirt;
- Just before gluing it is necessary to degrease the prepared surface along its entire length (if it is not paper wallpaper).
If the first time to glue the cloth failed, the second time to use the regular adhesive layer will not work. You will have to use double-sided adhesive tape, which should be glued along the route of the webbing, and then attach a strip light to it. The same method can be used immediately if there are doubts about the quality of the regular adhesive. For example, when storing the luminaire for a long time.
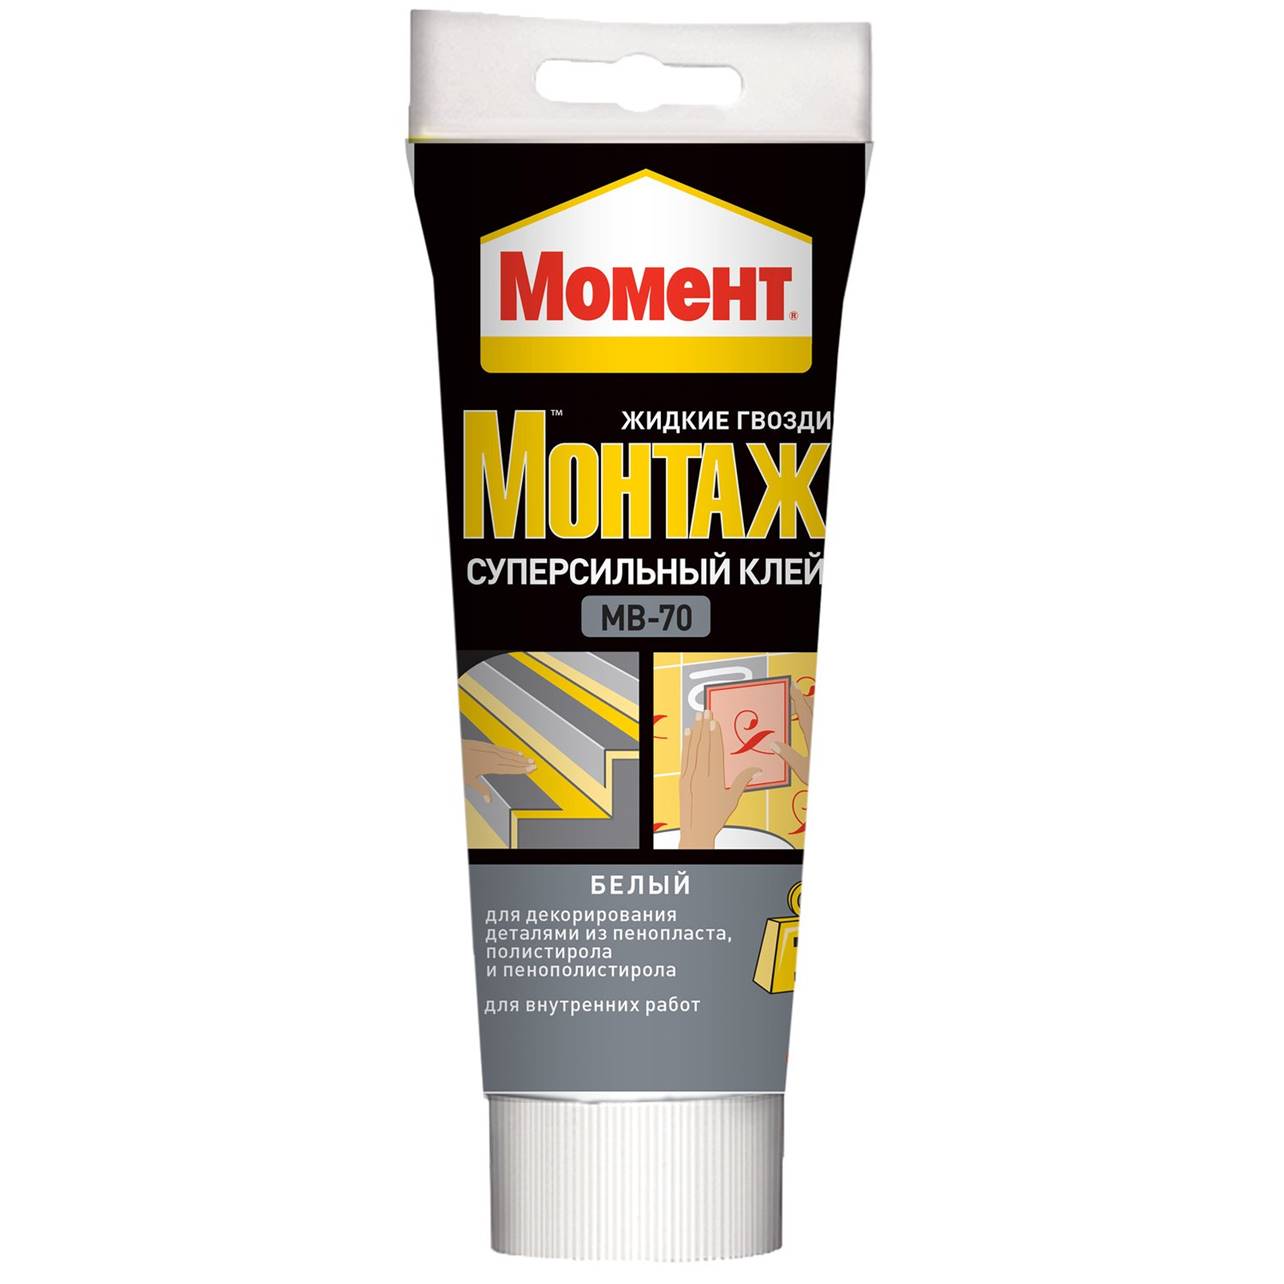
Another way is to use modern glue. For example, from a series of "liquid nails" or some kind of superglue. It is not necessary to completely lubricate the surface of the cloth - one drop on a few centimeters is enough.
You can not use hot-melt glue to attach the LED strip light. During operation, the substrate will inevitably heat up, the thermal glue will melt, and the cloth will peel off quickly enough.
By alternative mounting methods can include the suspension of the tape with metal staples and furniture stapler. This way can not be recommended, because when performing the assembly it is easy to damage the conductors of the web. This disadvantage is deprived of the method of suspension on plastic clamps, but the aesthetic moment in this case is close to zero. Therefore, this way is applicable only when suspending the lamp outdoors.

Medium wattage strips
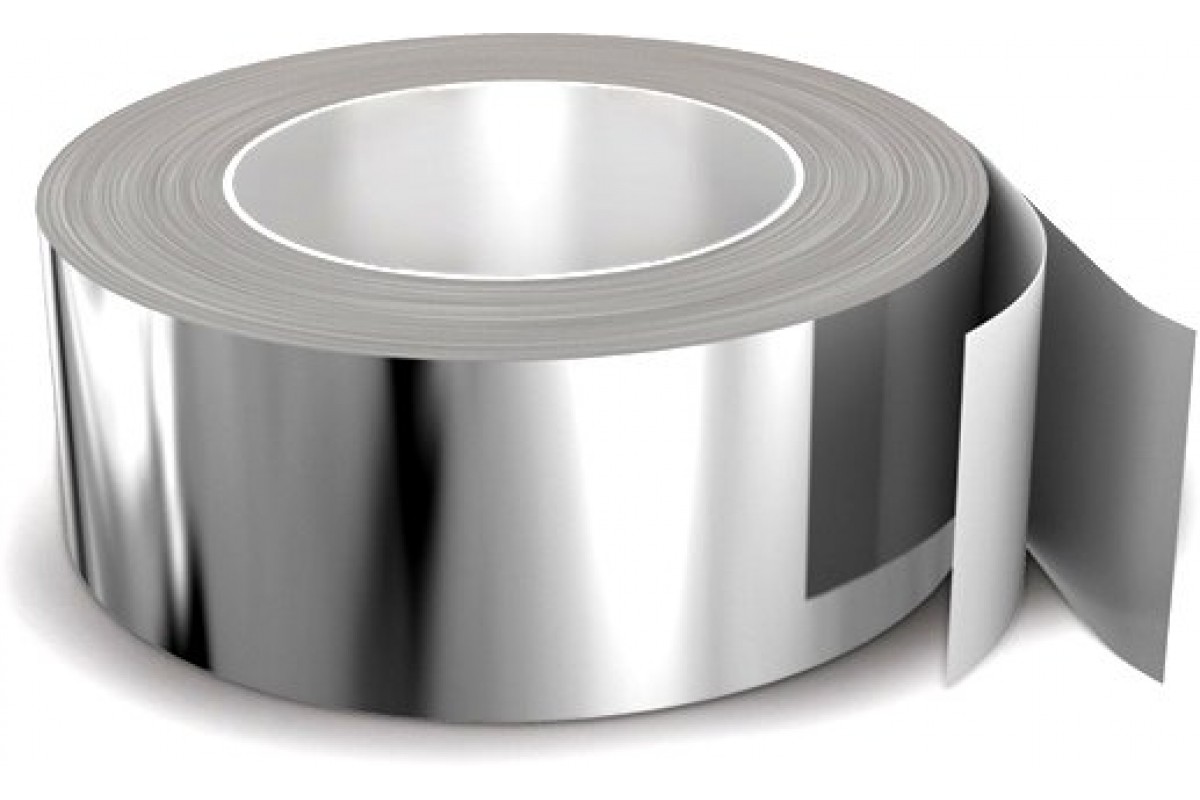
If 1 meter of light consumes 10-14 W, it already needs a small heat sink. It can be a double-sided aluminum-based scotch tape. If the cloth is glued to such an adhesive base, then with open laying, it is possible to carry out sufficient heat dissipation in such an inexpensive, uncomplicated and quite aesthetically pleasing way.
Important! Aluminum tape conducts electricity. When you remove the protective layer from the luminaire cloth on the back side may be open contact pads. They must be insulated with any material (insulation tape, plastic, rubber) to avoid a short circuit when you first turn on it.
Installation of high power luminaires
If the LED-light consumes more than 16 W per 1 m of length, it is necessary to mount it on an efficient heat sink. For this purpose, apply the aluminum profile, which is specially produced for the installation of LED-tape. Three types of profile are available for sale:
- overhead - It is convenient to mount on a surface or on a hanger;
- angular - optimal for mounting in corners for lighting at an angle of 45 degrees;
- mortise - fully hidden in the thickness of the groove.
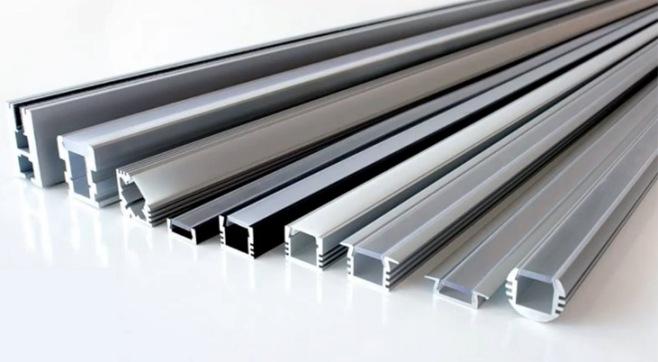
In addition to its technical function, the profile also plays a decorative role. Here you must also take care not to stick unprotected contact pads on the aluminum.
Wiring diagram
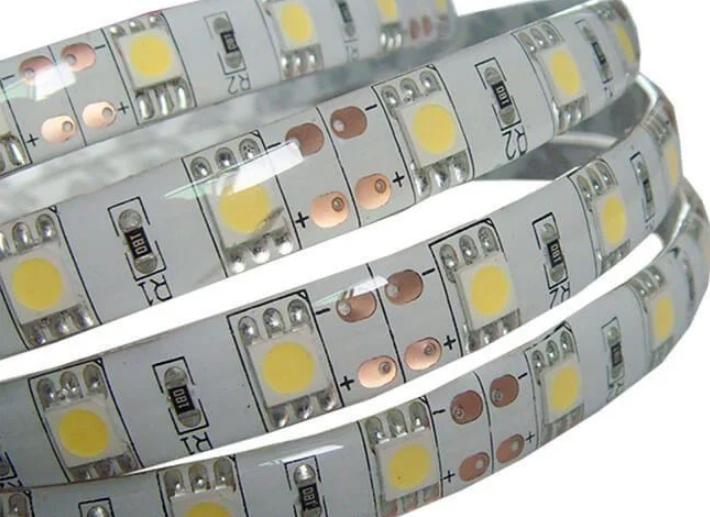
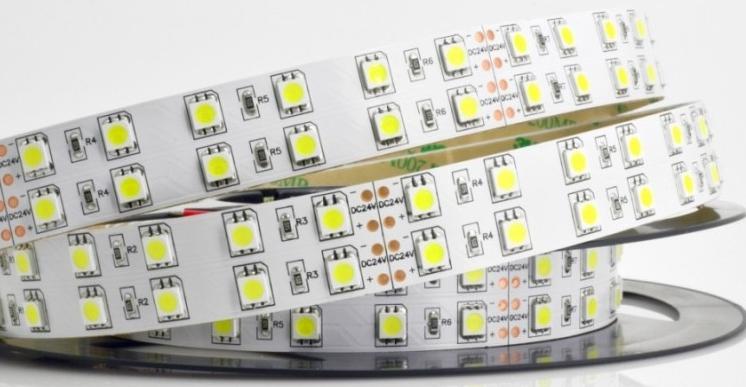
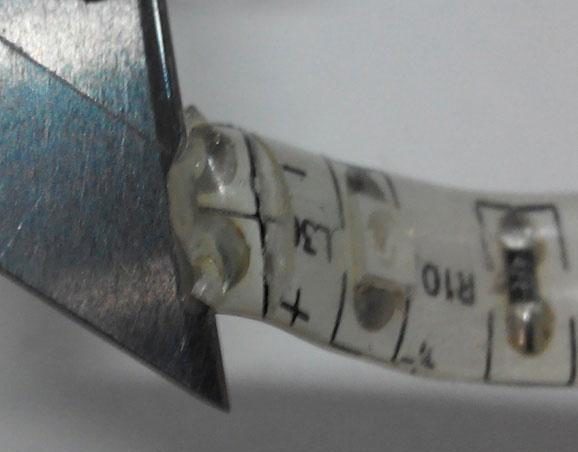
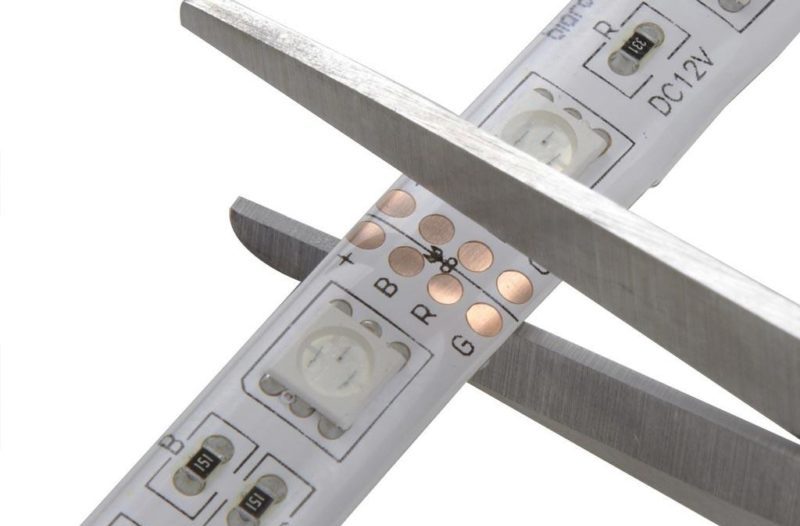
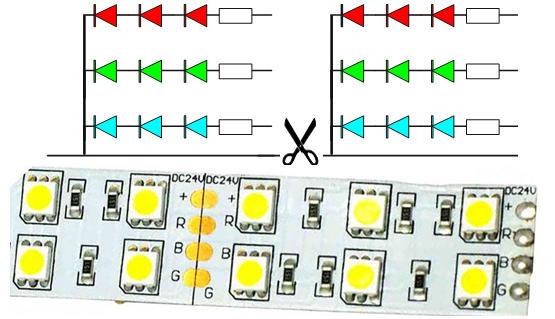
LED strip is a coil, which can cut in certain places. If you follow this rule, the shortest section will contain several LEDs and a resistor connected in series.
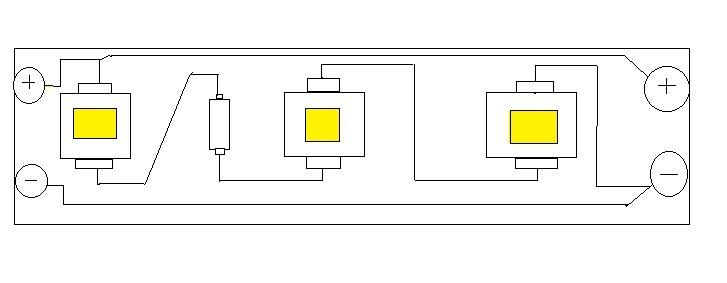
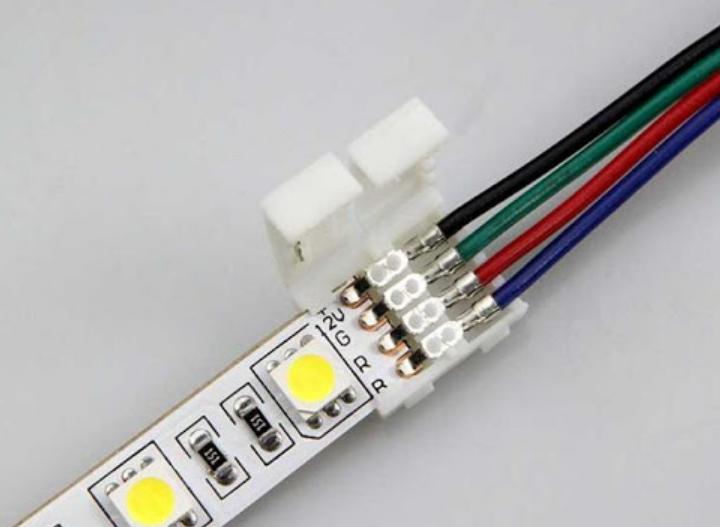
The RGB (RGBW) circuit is a bit more complicated, but the principle is the same - when cutting in the prescribed places you can get a piece with series-connected elements.
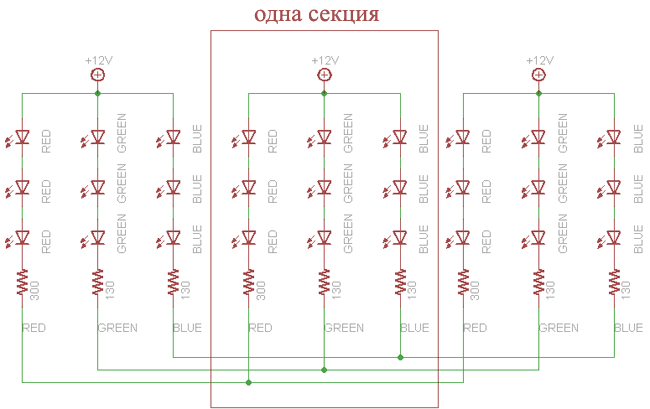
If you cut not adjacent terminals, you can get several such pieces connected to each other. Therefore, the pieces of ribbon are also connected in parallel to each other, but they have to be connected in series. This is how the circuit of this luminaire is built.
To assemble the complete circuit, you will need a power supply for the appropriate voltage and current consumption, which is equal to the current of the full length of the used strip with a reserve of 20-30%. LEDs are undemanding to many parameters of the supply voltage, so they do not need a power supply with a good smoothing filter or even a stabilizer. A lightweight, compact and inexpensive switching power supply will do just fine.
You will also need a power switch. In some cases a circuit breaker to protect the mains will be required. As a result, the general connection diagram of the monochrome strip will look like this:
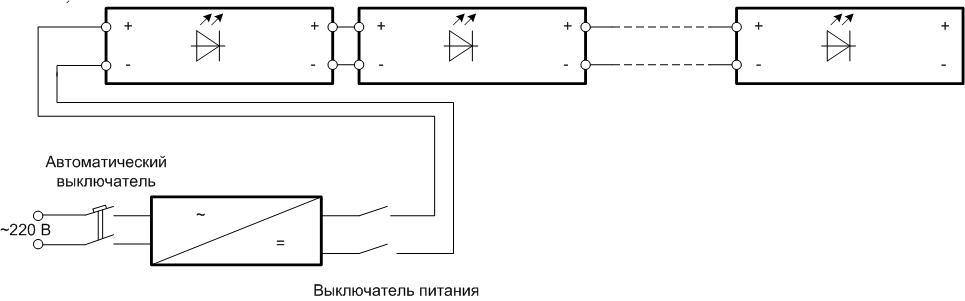
The minimum current of the circuit breaker is chosen with a small margin from the ratio Icr>Itape*(220/Upower), where Upower is the supply voltage of the tape.
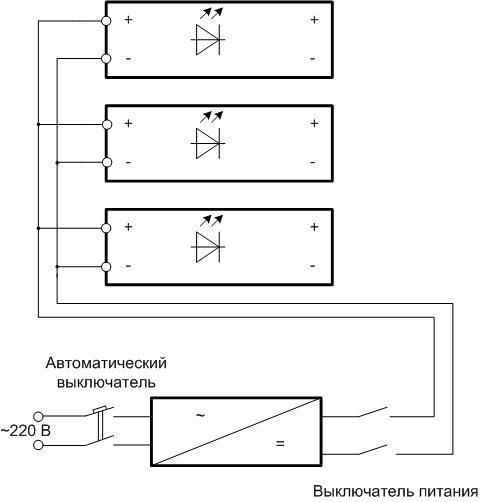
According to this scheme, you can connect pieces up to 5, maximum up to 10 meters long. If the total length of the pieces is longer, too much current will go through the conductors on the web, which will lead to overheating or burning out. Therefore, webs with a long total length are divided into groups of 5-10 meters and power them in parallel.
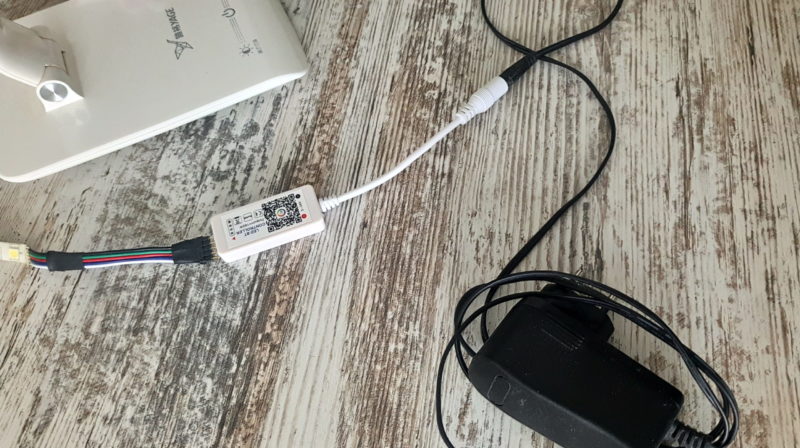
RGB-ribbon is connected in a similar way, but it is not interesting to use it in a static mode, so there is another element - RGB-controller that controls the colors of glow in the dynamics.
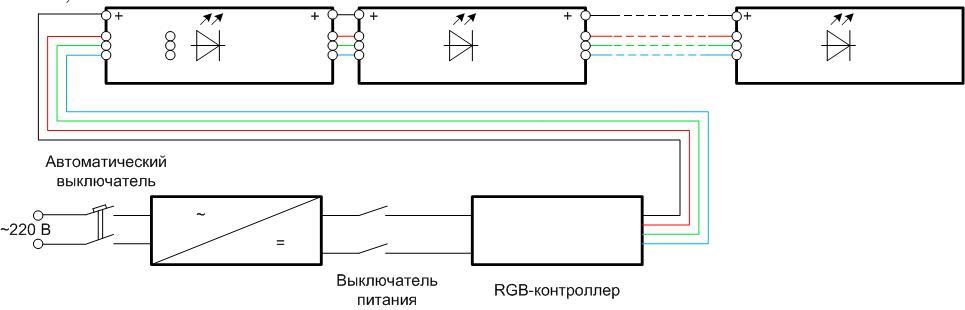
If the total length does not allow you to power the tape in series, you do the same as in the monochrome version, but another problem is added - the load capacity of the controller. In order not to overload its outputs, signal amplifiers are added - one for each group of segments.
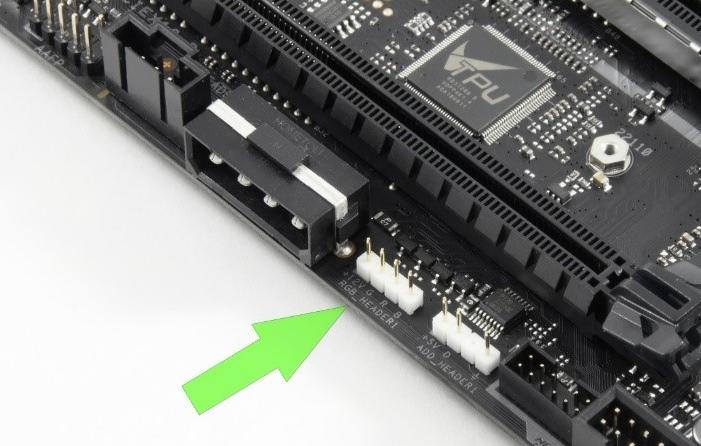
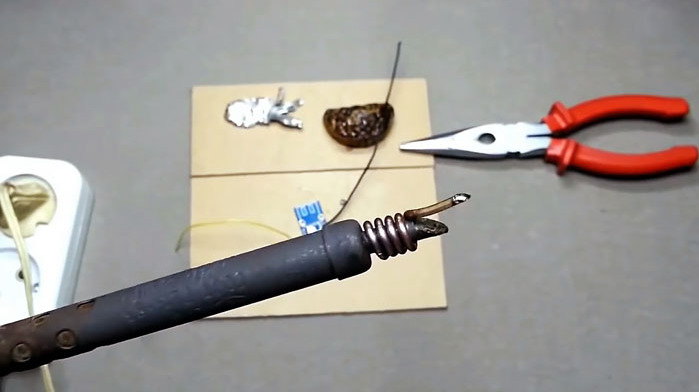
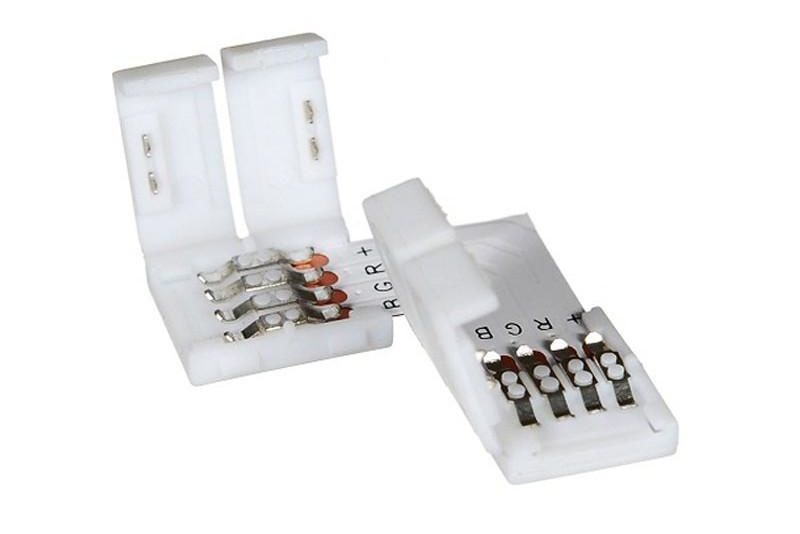
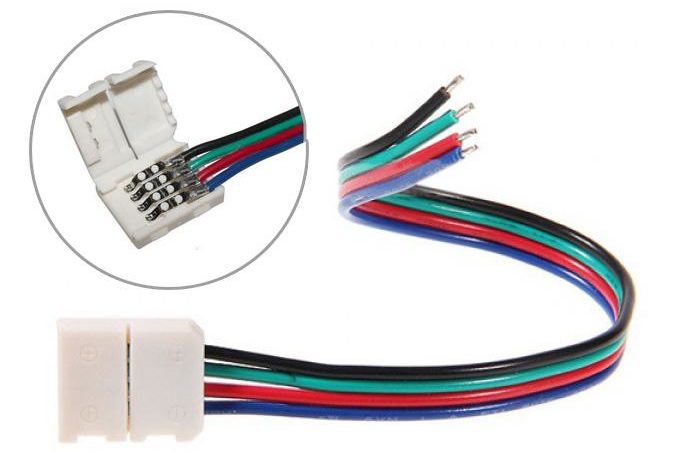
To connect the components to each other, you can use special connectors. With their help, the segments of the strip are connected to each other at different angles. But despite the assurances of manufacturers, the reliability of these devices does not compare with the traditional soldering .. Therefore, it is recommended to master this process and mount the tape only with a soldering iron.
What to look for before buying
To approach the choice of LED-lighting responsibly, it is necessary to understand what affects the characteristics. They can be divided into two groups - electrical and lighting parameters.
- The main electrical characteristic by which the tape is selected - the power consumption. It is convenient to express it in the form of a specific value - it is the power consumed by one meter of the strip. It depends on the number of LEDs on this length and their type. Knowing the specific power and the length of the strip, you can quickly calculate the total power consumption.
- Another necessary parameter is the operating voltage of the strip. Indoors use ribbons from 12 to 36 V, fixtures for 220 V are used for outdoor lighting.
These characteristics will help to choose a power source. And the light parameters are needed to organize the optimal backlighting:
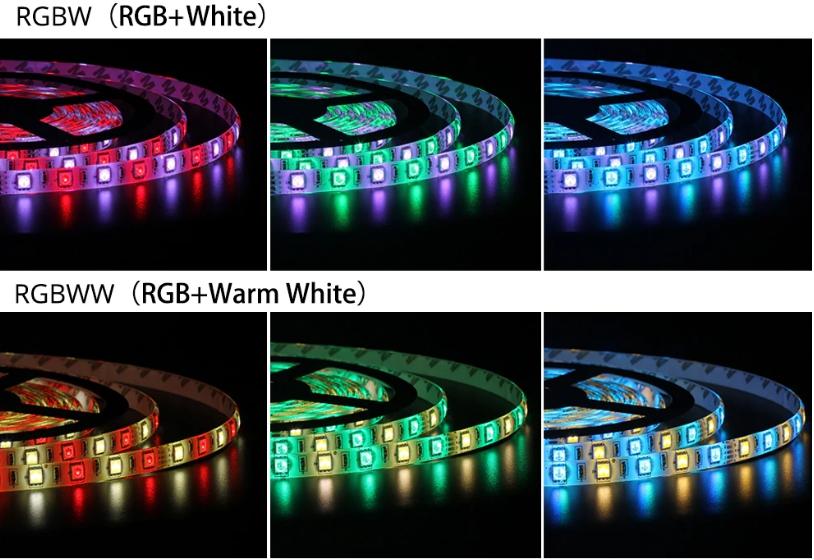
- the color of the glow - monochrome or RGB;
- color temperature of luminescence - when it increases from 3500 to 7000 K, the spectrum of radiation shifts from warm red-yellow shades to cold blue-violet;
- opening angle - determines the angle at which the light will be emitted (along the strip the sectors of light overlap, so this parameter will determine the angle across the base).

Among the important parameters should also be noted the IP degree of protection. The first number means the level of protection from solid particles, the second - from the ingress of moisture. IP68 and above allows you to mount and operate the light fixture even under water.
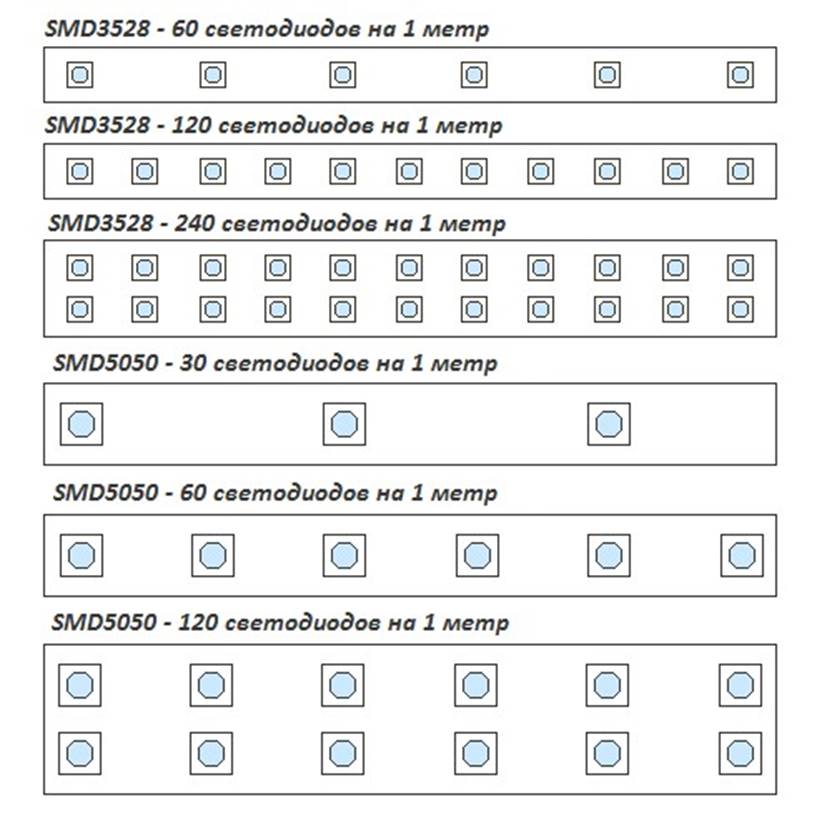
Separately we should mention the cutting pitch (determines how small a section of web can be obtained) and the number of LEDs per meter. This parameter does not provide any information by itself, but it can be used to estimate the power indirectly, if it is not known. And sometimes the color of the base is also important. It determines how well the light will fit into the interior.
Tools and the process of installing LED strip
After processing all the information, its analysis and the selection of a suitable fixture, you can begin the installation of LED strip. To do this, you will need tools:
- scissors for cutting pieces of cloth of the required length;
- glue or double-sided adhesive tape to strengthen the attachment - if necessary;
- aluminum tape or profile - for the tapes of high specific power;
- connectors of necessary length or soldering iron with consumables (for serious masters only);
- wire cutters for cutting wire segments;
- A knife or wire stripper to strip the ends of the wires.
When planning the installation it is necessary to determine where to install the power supply so that the length of the wires from the 220V source to the consumers (the light strip) is minimal. Then you need to think about the mounting of the strips, inspect and prepare the surfaces. If the tape is powerful, you must start by attaching the profiles. If not, you can immediately start gluing the pre-cut panels. After gluing, you can .. If the installation is soldering and outdoors, you may have to increase the power of the soldering iron - even a small breeze will noticeably reduce the temperature of the stinger.
The power switch must be installed in a convenient and accessible place. Then the RGB controller, if available, and the power supply are connected with the wires prepared in advance.
To the 220 V mains the power supply must be connected through a circuit breaker - existing or newly installed, this can save you a lot of trouble.
There is nothing complicated about installing the LED strip. A home handyman with a little skill and knowledge can cope with this task independently.