Simple ways to connect LED strip
LED strip - a very popular lighting fixture. With its help, you can make ordinary lighting, you can make decorative or architectural lighting. To independently connect the LED strip, you need to understand a few things.
What you need for work
To work in a general case you will need:
- The actual LED light strip of the required length;
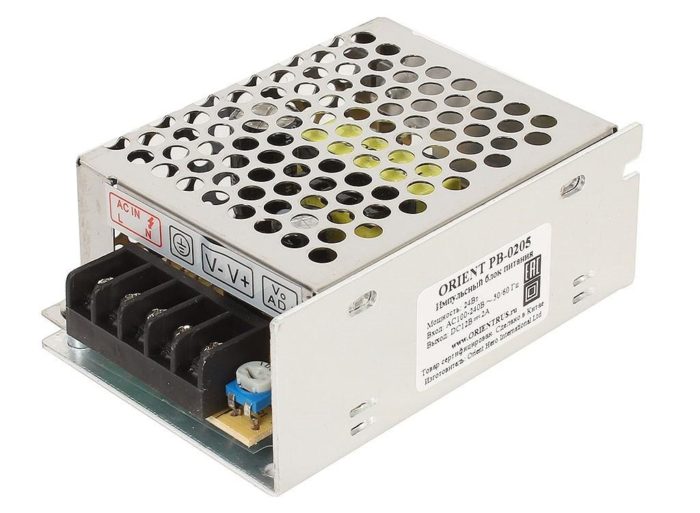
- A power supply (or rectifier for 220 V ribbon);
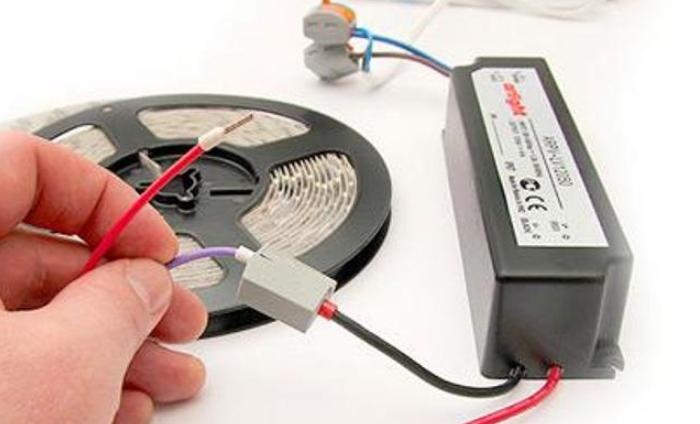
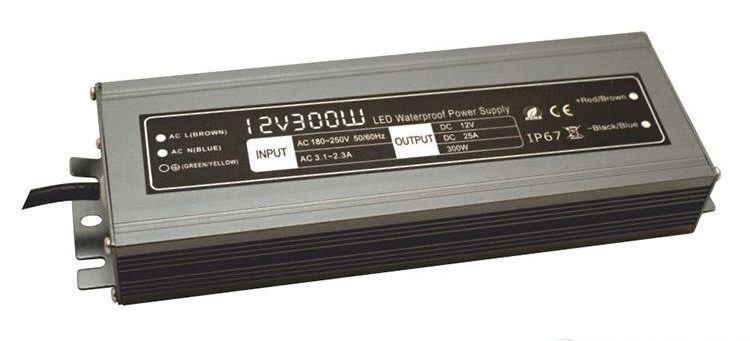
![Power supply unit]() Power supply must be chosen with extra power.
Power supply must be chosen with extra power. - A dimmer (if necessary);
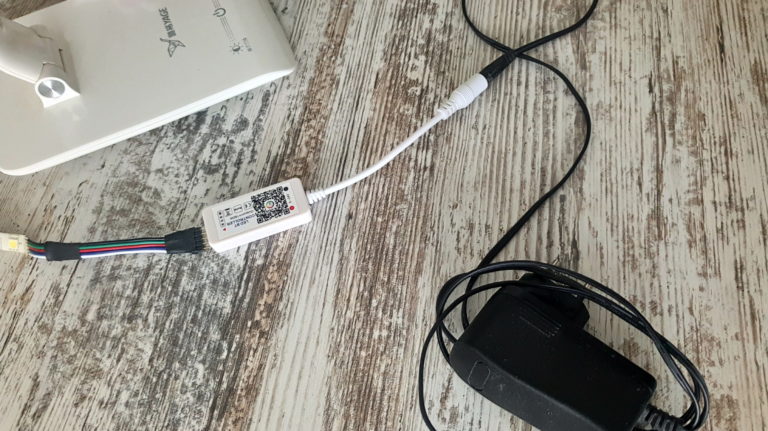
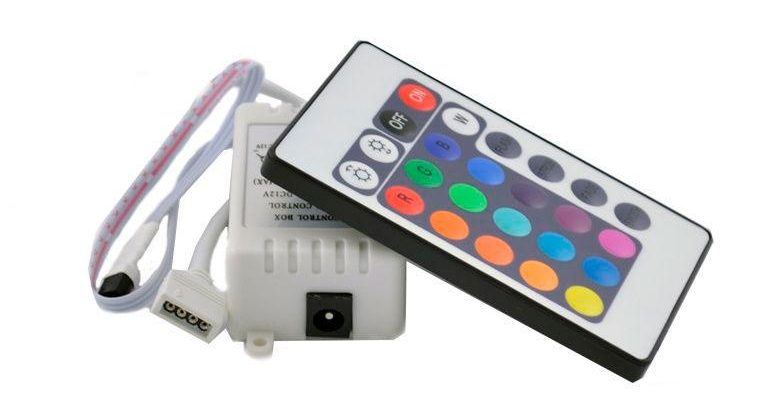
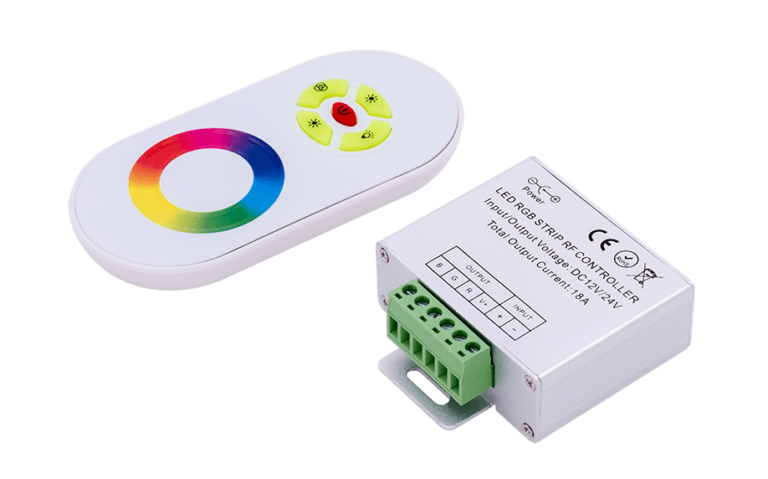
- RGB controller (for colored strips);
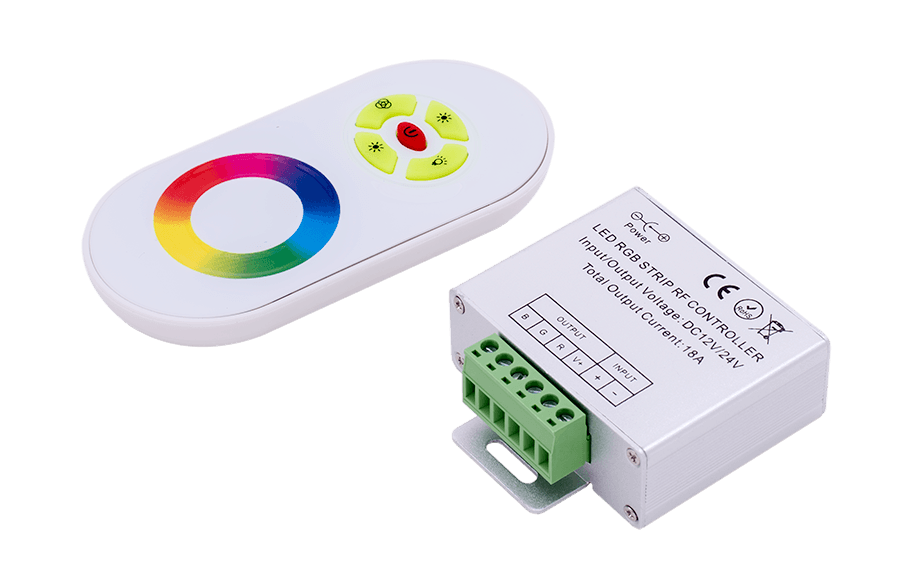
![RF-controller for 12/24 V and current up to 18 A.]() RF controller for 12/24 V and current up to 18 A.
RF controller for 12/24 V and current up to 18 A. - RGB amplifier (if necessary);
- Connecting wires with the required cross-section;
- power switch;
- connectors (although it is better to use connectors (although it is better to use soldering ).).
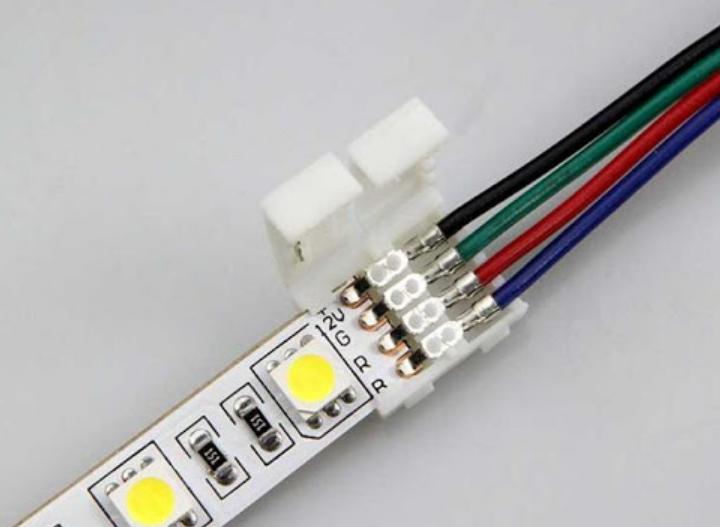
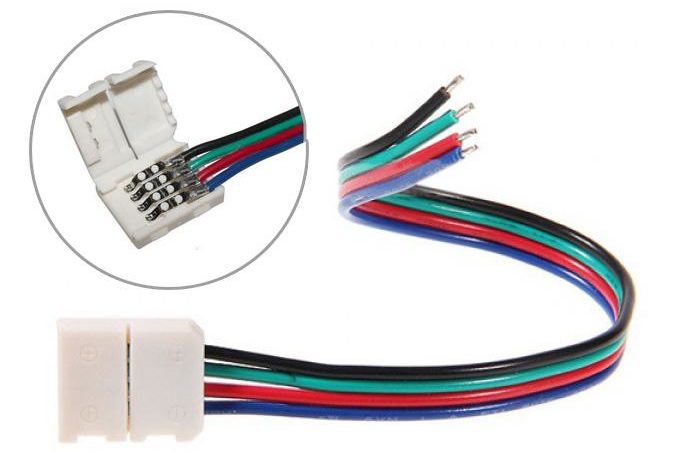
![Easy ways to connect the LED strip]() RGB connector for direct connection.
RGB connector for direct connection.
This is a complete list, some items in a particular situation will not be needed.
Of the tools you will need:
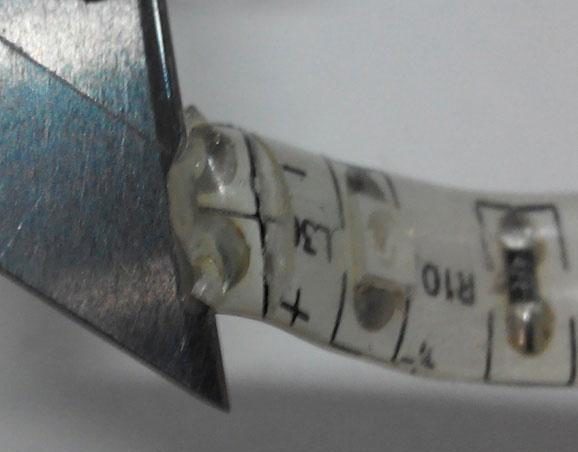
- A mounter knife (for stripping the insulation);
![Simple ways to connect LED strips]() A knife to clean the silicone coating .
A knife to clean the silicone coating . - Pliers (to cut off the necessary pieces of wire);
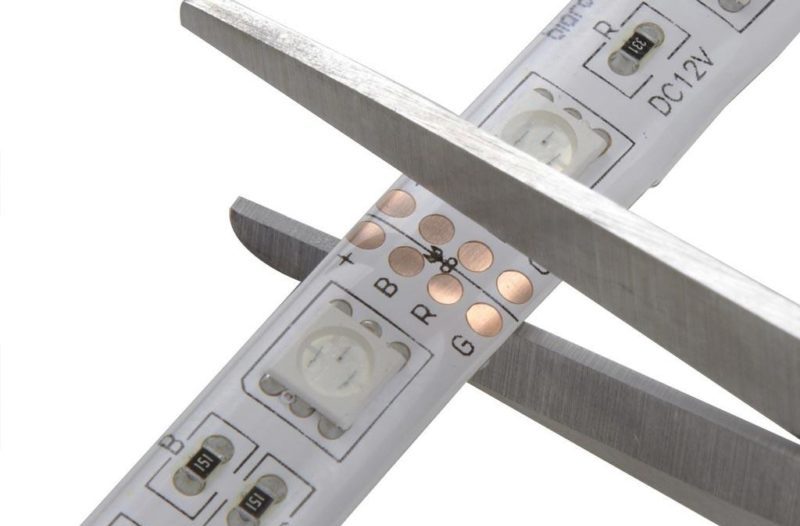
- scissors (for to cut the pieces of ribbon).
![Places for scissors.]() Scissors for cutting.
Scissors for cutting.
A special insulation stripper can be used instead of a knife. And if a soldering connection is chosen, a soldering iron with consumables will be needed.
Tape Attaches on the adhesive layer, but to strengthen it or to correct mistakes it is good to have on hand:
- double-sided tape;
- glue.
You can fasten the tape with plastic ties, but for aesthetic reasons this method is used only outdoors. In this case, you must use black ties - white is not resistant to natural ultraviolet light and will not last long. Fasten the furniture staples categorically not recommended - the risk of damaging the cloth and short circuit is very high.
Calculation of the cross section of connecting wires
The cross-section of the conductors should not be less than allowed - this leads to overheating and subsequent problems. Too large a cross-section - to the financial costs and inconvenience of installation. The current on the low voltage side can be calculated by knowing the total power consumption (Rob) and the operating voltage of the belt:
I=Robsh/Urab.
| Conductor cross-section, sq.mm | 0,5 | 0,75 | 1 | 1,2 | 1,5 |
| Current allowed, A | 11 | 15 | 17 | 20 | 23 |
Current on 220 V side is calculated by formula I220=Iunder*(U of the tape/220 Vwhere:
- I220 - 220 volt side current;
- I down - luminaire side current;
- U of the luminaire - supply voltage of the luminaire.
You should also take a small safety factor on the efficiency of the power supply.
Important! In outdoor installations, the cross section of conductors must provide not only the required economic current density, but also the mechanical strength.
Choice of power supply
The power supply has two basic requirements:
- Its output voltage must match the supply voltage of the lighting fixture;
- the power must provide power to the strip with a reserve.
The power is calculated using a simple formula:
Rbp=Rud*L*Kzapwhere:
- Rbp - calculated power of the power supply, W;
- Rd - specific power consumed by 1 meter of tape, W;
- L - total length of LED-tape, m;
- Kzap - safety factor, taken equal to 1.2...1.4.
Important! In most cases the calculation will result in a power that does not fit in the standard power supply rating range. Rounding should be done to the nearest higher value.
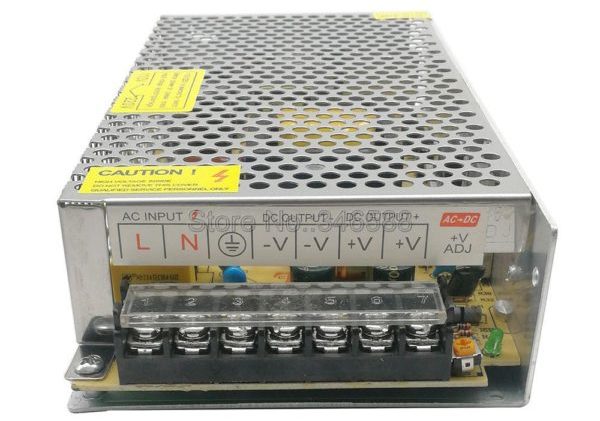
You must also choose the version of the power supply:
- sealed - suitable for outdoor applications (inside is not rational - such modules need better conditions for natural cooling);
- Non-hermetic . - are usually installed indoors.
For non-hermetic two options are possible:
- with natural cooling;
- With forced ventilation.
The second option has smaller dimensions, but the fan makes noise. Therefore, it is not installed in rooms with the presence of people (apartments, offices).
The video talks about the main types of power supply units by degree of protection.
How to do without a power supply
If there is no possibility of installing a power supply, there are two options:
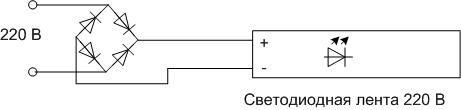
- Use a strip designed for a voltage of 220 V;
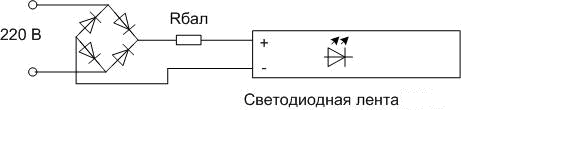
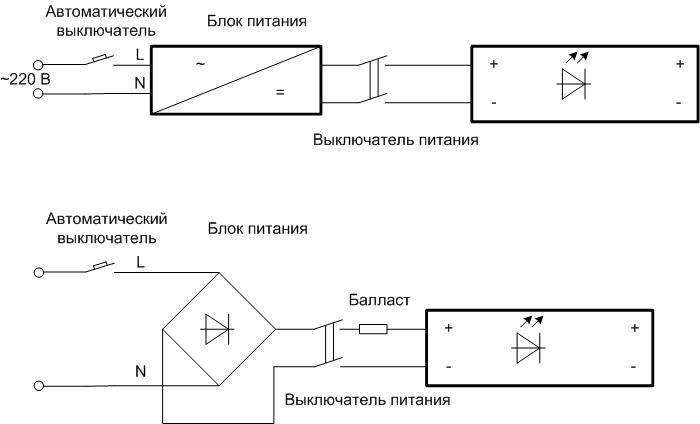
- To power a low-voltage strip light without a transformer through a ballast element, which limits the current and dampens the excess voltage.
In the first case Do not connect the LED fixture directly into the AC mains.. The LED, as a semiconductor device, will only pass the positive part of the sine wave. But during the negative, it will have a reverse voltage applied to it, which the LED or chain is not designed for. So the life of the light fixture will be short. You have to use a rectifier. A bridge rectifier is better. Diodes must be able to withstand the full current of the strip and reverse voltage of at least 320 V.
This also applies to the second option, but here you will also need an additional resistor. Its resistance is calculated by the following procedure:
- Find the operating current according to the formula I=Rud*L/Unom, where: Ore - specific power consumed by 1 meter of tape, W; L - total length of LED-tape, m; Unom - rated voltage of the luminaire (12...36 V).
- Voltage drop at the ballast is defined Ubal=310-Unomwhere 310 - amplitude value of voltage in the network.
- The resistance of the ballast is found R=Ubal/I. If the current is in amperes, the resistance will be in ohms.
- The power of the resistor is calculated as Rres=Ubal*I. The next highest value in the standard power range is taken.
Calculation is somewhat simplified, it does not take into account the resistance of the LED in the open state. But for practice the accuracy is sufficient.

A capacitor can be installed instead of a resistor. The advantage is that it will not heat up. Calculation of the capacitance is done according to the above formula:
C=4.45*I/(310 - Unom), where:
- С - necessary capacitance in μF;
- I - operating current, found earlier;
- 310 - amplitude voltage of the network in volts;
- Unom - rated voltage of the luminaire (12...36 V).
But there will be additional elements in the circuit:
- R1 - resistor to discharge the capacitor after removal of power;
- R2 - to limit the inrush current to charge the capacitor at the moment of switching on.

The rating of the first resistor is a few hundred kilohms, the second a few tens of ohms.
Connecting the LED-tape to the power supply
LED strip is connected to a voltage source, respecting the polarity - the common terminal PSU (V-, COM) is connected to the negative terminal of the lamp, the positive (V+) to the positive terminal. If an RGB strip is connected, its common wire for all colors is the anode (+), and it is controlled by connecting the corresponding line to the common wire.
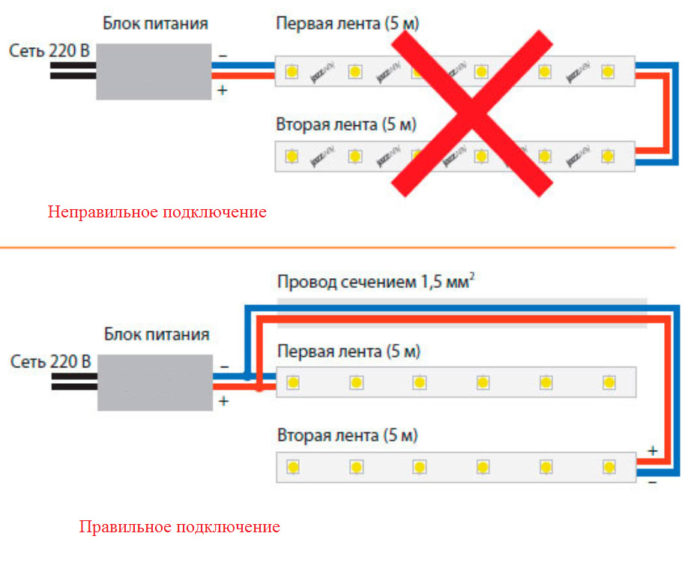
The luminaire can be made as a single piece of tape, or it can be made as several pieces of tape. If the total length does not exceed 5 metersThe ribbon segments (color or monochrome) can be connected in series (but they will be connected in parallel - this is the scheme), observing the polarity - plus to the plus, minus to the minus.

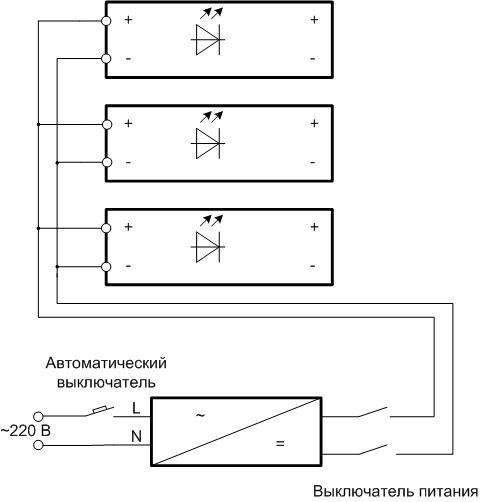
If the length exceeds 5 meters, it means that the luminaire will consume significant current. The conductors of the strip are not designed to transmit high power, so even if you use a serious power supply, the segments should be grouped so that the total length of each group does not exceed so that the total length of each group does not exceed the limit of 5 meters, and connect them in parallel. Use conductors (or connectors) of the required cross-section.
Adjusting the brightness of the light
A special device, a dimmer, is used to regulate the intensity of the LED light. It regulates the current through the LEDs, changing the brightness.

Connection of the dimmer is standard - to the input of the DC source, to the output of the luminaire, all respecting the polarity. In most cases, the dimmer is combined with the power switch, so an additional switching element is not required. But the dimmers themselves come in different versions:
- Recessed with manual operation.. They are installed similar to household light switches, but have a rotary knob. By turning it, you can adjust the intensity of the tape glow.
- Flush-mounted with touch controls With LCD-display. Also mounted like switches, but have a modern look and advanced adjustment features, including on/off timers, soft wake-up mode, etc.
- Remotely controlled.. Controlled by remote control via infrared or radio. With the second option dimmers are marked RF, they can be hidden behind the elements of the interior, to control the glow from the next room.
Dimming controller has two important electrical characteristics by which it is selected:
- operating voltage (must match the supply voltage of the LED luminaire);
- maximum load capacity (requires that it can withstand the operating current of the strip).
Unlike LED lamps, all LED strips are dimmablebecause they do not have a driver (current stabilizer). Specifying "dimmable" in the technical specification (a reference to the existence of non-dimmable products) is a marketing ploy. You can always connect any LED strip to a dimmer.
The need to use switches
Even if the LED strip is supposed to glow permanently, the power switch after the voltage source is necessary. In case of repair or preventive maintenance (cleaning of dirt, etc.) it is convenient to remove the voltage with a single movement of the switching element.
Important! If you use a transformerless connection of the luminaire, you must use a switch that disconnects both conductors simultaneously.
On the 220 V side, there must be a circuit breaker (regardless of the circuit). If the power supply or rectifier is plugged into a household socket, it is likely to be protected by a circuit breaker. If you use a permanent connection, you should always consider installing a circuit breaker. It serves as both a switching element and a means of protection in an emergency situation. And it is never superfluous to install RCDs, especially in the absence of galvanic isolation in the form of a transformer.
Video: Installation of a contactless flush-mount switch for LED strip.
Controller for color effect control
RGB ribbon can be connected as a monochrome ribbon. This is not economically feasible - a monochromatic light is much cheaper. You can connect it to manually control the glow - for example, with potentiometers. This is also not the best option. For the most complete access to the possibilities of the colored light, it is better to take an RGB-controller, which allows you to use the potential of the strip in the most efficient way.
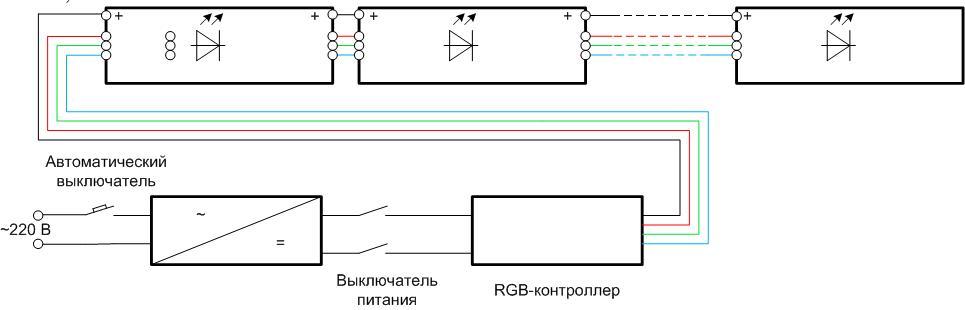
It is connected after the power supply, after it - segments of the tape with a total length of up to 5 m. Connecting It is necessary to follow the pinout so that the pins of the same color are connected to the corresponding pins.
If you need to control a longer strip, simply connect in parallel groups of lights will not always work. The power of the controller may not be enough, and you have to use RGB amplifiers (in foreign technical literature - repeaters). One or more, depending on the load capacity of each repeater.
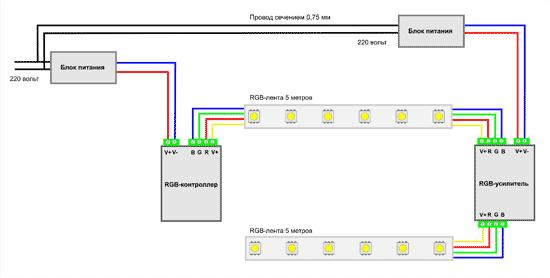
If the power of one power supply is sufficient, the second power supply may not be installed.
This video review compares 4 types of controllers for multicolor LED strip.
Connecting the strip is not difficult to do yourself, it requires minimal knowledge and skills. If the case turns out to be difficult and beyond the review, the solution can be found by turning to professionals. You can find them in firms engaged in lighting or on the Internet in specialized forums. The main thing is to remember the rules of safety.