Technology of soldering LED strip with their own hands
LED strips are popular in the world of lighting technology. It is a convenient solution for creating different types of lighting. In the process of installation, it is often necessary to connect two strips with each other.
How and why to connect the segments of LED-tape
LED strip is sold in rolls. The full coil is not always needed, usually you need small sections of cloth, powered from a single voltage source. Solid webbing can be cut - but only in specially designated areas. When you assemble the pieces of tape on site, they must be connected in series or each section must be powered by its own cable from its own power source, which is not economically feasible and does not add reliability to the system.
You can connect the strips with strips of wire - each two pieces of tape are connected to each other with two wires, taking into account the polarity. If RGB or RGBW, it is necessary to comply with the connection of conductors at both ends of the strips. The cross-section of the wires must be designed for the full current of all sections of the strip.
| Cross section of conductor, sq.mm | 0,5 | 0,75 | 1 | 1,2 | 1,5 |
| Allowed current, A | 11 | 15 | 17 | 20 | 23 |
If there is no table at hand, you can use the rule of thumb - 1 sq.mm cross-section of copper conductor can carry a current of 10 A. This value is much overestimated, in fact the allowable current through such a cross-section is at least twice lower (depending on the way of laying). But here there is no risk of making a mistake in the smaller side, and that is what can lead to unpleasant consequences. In addition, in open laying the cross-section of the conductor must not only provide current-carrying capacity, but also have sufficient mechanical strength, so the thickness of the wire in these cases overestimate.
Soldering or connector
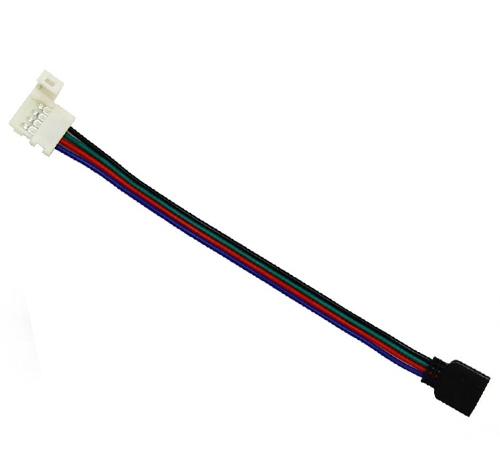
Connectors seem to be very convenient for this purpose. They allow you to quickly and without the use of additional tools connect two pieces of tape with each other. In reality, not everything is as good as it seems at first glance:
- When using connecting accessories, the contact patch area is small;
- This method does not guarantee that the contact pads are pressed tightly.
Both of these factors lead to increased transient resistance at the connection point. The currents consumed by the ribbon are high, and can be up to several amperes. This leads to overheating of the contact, burn through and complete loss of electrical connection. In the worst case scenario, it can lead to a fire. Furthermore an open copper contact is prone to oxidationThis leads to an even greater loss of conductivity, heat, more oxidation and so on in a circle. Given that there are 4 sources of unreliability per connection (2 wires on both sides each), the choice of a good craftsman is unequivocal - only soldering.

Tools and materials
The soldering process itself is not difficult, but requires some skill. Therefore, those who have never held a soldering iron in their hands would do well to practice on scraps of wire.
To do the soldering, you will need:
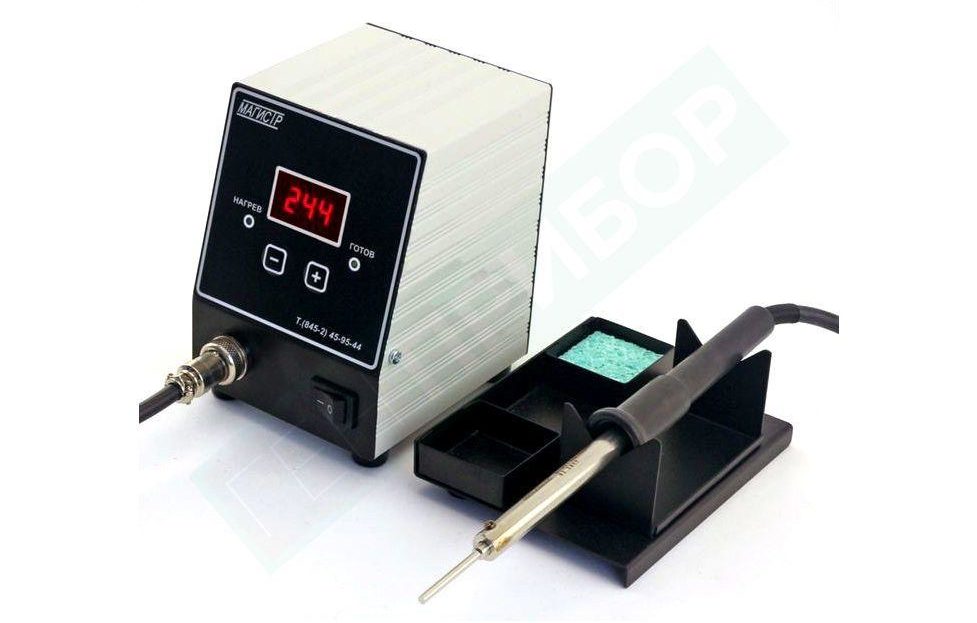
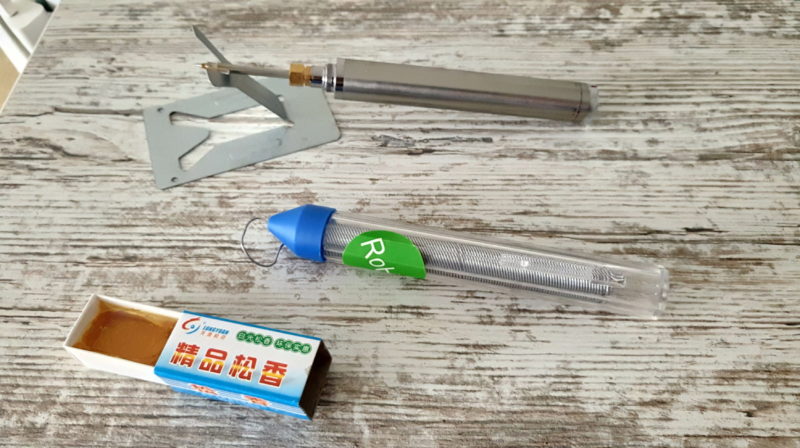
- Soldering iron A 30-40 watt soldering iron. Less power will not warm up the soldering point sufficiently and will turn the whole process into a torture. Increased power will easily cause the soldering point to overheat, especially if you are inexperienced. It is even more convenient to use a soldering station, but it is expensive and it is not economical to buy it just to solder a few strips of tape.
- Flux. This can be classic rosin. Soft or liquid fluxes like LTI are much easier to use. Hard rosin can be crushed and dissolved in alcohol.
- Solder. You can use almost any solder with an adequate melting point. For example, classic PIC-60 or other lead-tin solders. Pure tin can be used, but it is expensive and offers no advantage.
Important! Never use liquid and soft acid-based fluxes! During soldering flux is inevitable splashing. If acid gets on the conductors or soldering points of LEDs in the future, it will inevitably cause corrosion, which will lead to the loss of performance of the strip.
It also does not hurt alcohol or acetone to remove flux residue after soldering. You will also need copper wire (preferably flexible stranded wire) and tools for preparing it:
- wire cutters to cut the wire to the right length;
- a wire cutter for stripping the insulation (it is even better to use a special stripper);
- to seal the soldering point you will need duct tape or heat shrink tubing of appropriate diameter.
If the process will be carried out without assistants, it is convenient to use a stand with a clamp as a "third hand".
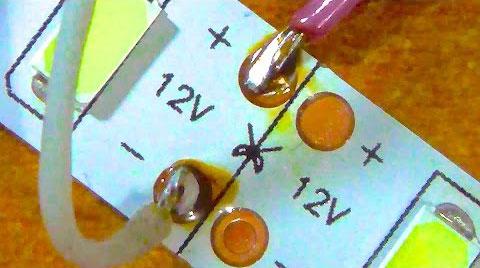
The process of soldering the conductors to the pads
First you have to prepare the wires:
- cut pieces of wires of necessary length;
- Remove the insulation on both sides at a distance of 5-7 mm with a wire cutter or a special puller.
Next, the soldered surfaces should be tinned. The stripped wire ends should be coated with flux:
- If liquid flux is used, the stripped areas should be moistened with it;
- If you use soft flux, the ends, free of insulation, should be abundantly smeared;
- if using rosin, you need to melt a small amount, and transfer it to the free sections so that the multicore wire was soaked in flux, and the surface of the single core was completely soaked.
The video describes in detail the process of tinning wires.
Next, you need to draw a little solder with the soldering iron's sting. The surface of the solid wire should be covered with lead-tin melt on all sides. A stranded wire is instantly soaked with solder when a heated sting is applied to it with molten flux.
The pads are also wetted with molten, liquid or soft flux and fired in the same manner. The solder should be enough to form a small bump of metal on the pad.

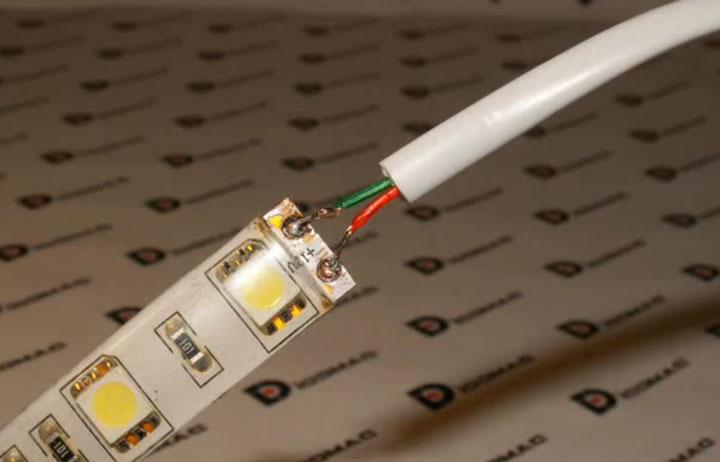
Next, it does not hurt to tin the tinned surfaces with flux again. After that, you need to put the wire to the pad at the right angle and heat the place of connection with a soldering iron with a small amount of solder. Solder the LED strip should be fast enough not to damage the basis of the cloth. To accelerate the cooling of the solder, it is recommended to blow vigorously on the soldering place. After completing the work, the flux residue should be washed off with alcohol or acetone.
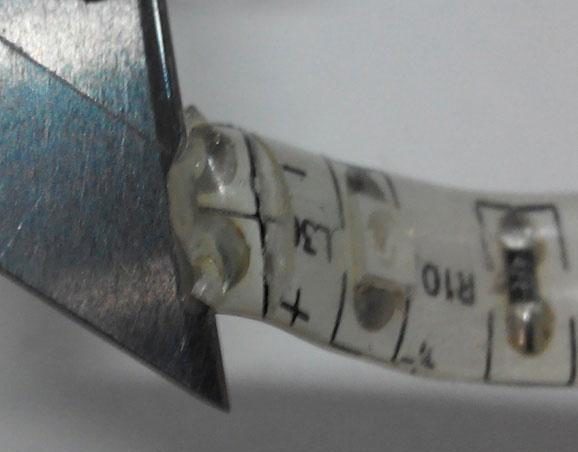
If the tape has a silicone coating
It is convenient to use silicone coated tape for outdoor installation. The process of soldering conductors to such a strip is almost the same, but before you start, you need to remove the silicone on the area with contact pads with a knife, and then the LED strip can be soldered in the usual way.
If necessary, when the work is finished, you can seal the cut area with a transparent silicone sealant, but you should only use a neutral composition. Acidic can cause corrosion of conductors and components.
How to achieve quality soldering
Beautiful, neat, quality soldering comes with experience. But the learning curve can be shortened by taking simple points right away:
- The tip of the soldering iron should be well tinned. If it is copper, it should be deburred with a file, removing the soot and giving the necessary shape to the working surface. Next, you need to plug in the soldering iron, after a little heat dip the sting into the flux and wait until it reaches operating temperature. After that, you should quickly rub the working surface with a piece of solder. If you haven't used it before, it is advisable to forge it on a hard surface - this will reduce the tendency to burn and prolong its service life.
- If it is galvanic-coated steel a file should not be used to deburr it - it is easy to tear off the layer applied and the working surface will be useless. It is impossible to tin it, you will have to throw it away. For the same reason, you cannot tin such a sting with acid flux - it will "eat away" the coating.
- If you use a soldering iron with temperature control, you have to set the temperature of the tip 5-10 degrees higher than the melting point of the solder. If this is not done, then due to installation errors and because of inaccurate proportions of metals in the solder, the stinger will not be able to turn the solder into a liquid, but will only bring it to a state of mush. In this case it is not worth talking about quality soldering. See the table below for the melting point.
- Do not skimp on flux during servicing and soldering. Surplus flux and spatter can be removed with solvent afterwards.
- Use as much solder as you need. Excess solder does not impair the quality of soldering, but the lack of it will not make a reliable connection.
- Solder the conductors in as little time as possible to avoid overheating the base.
- After removing the soldering iron tip and before the solder solidifies, the conductors to be soldered should be completely immobilized - a "third hand" is very useful for this.
| Solder type | PIC-33 | PIC-40 | IOS-60 | POS-90 |
| Melting Point | 247 | 238 | 183 | 220 |
In general, solder conductors for LED strip is not difficult. You just need basic skills and diligence.